Asterra Tracker, single star alignment without the laser!
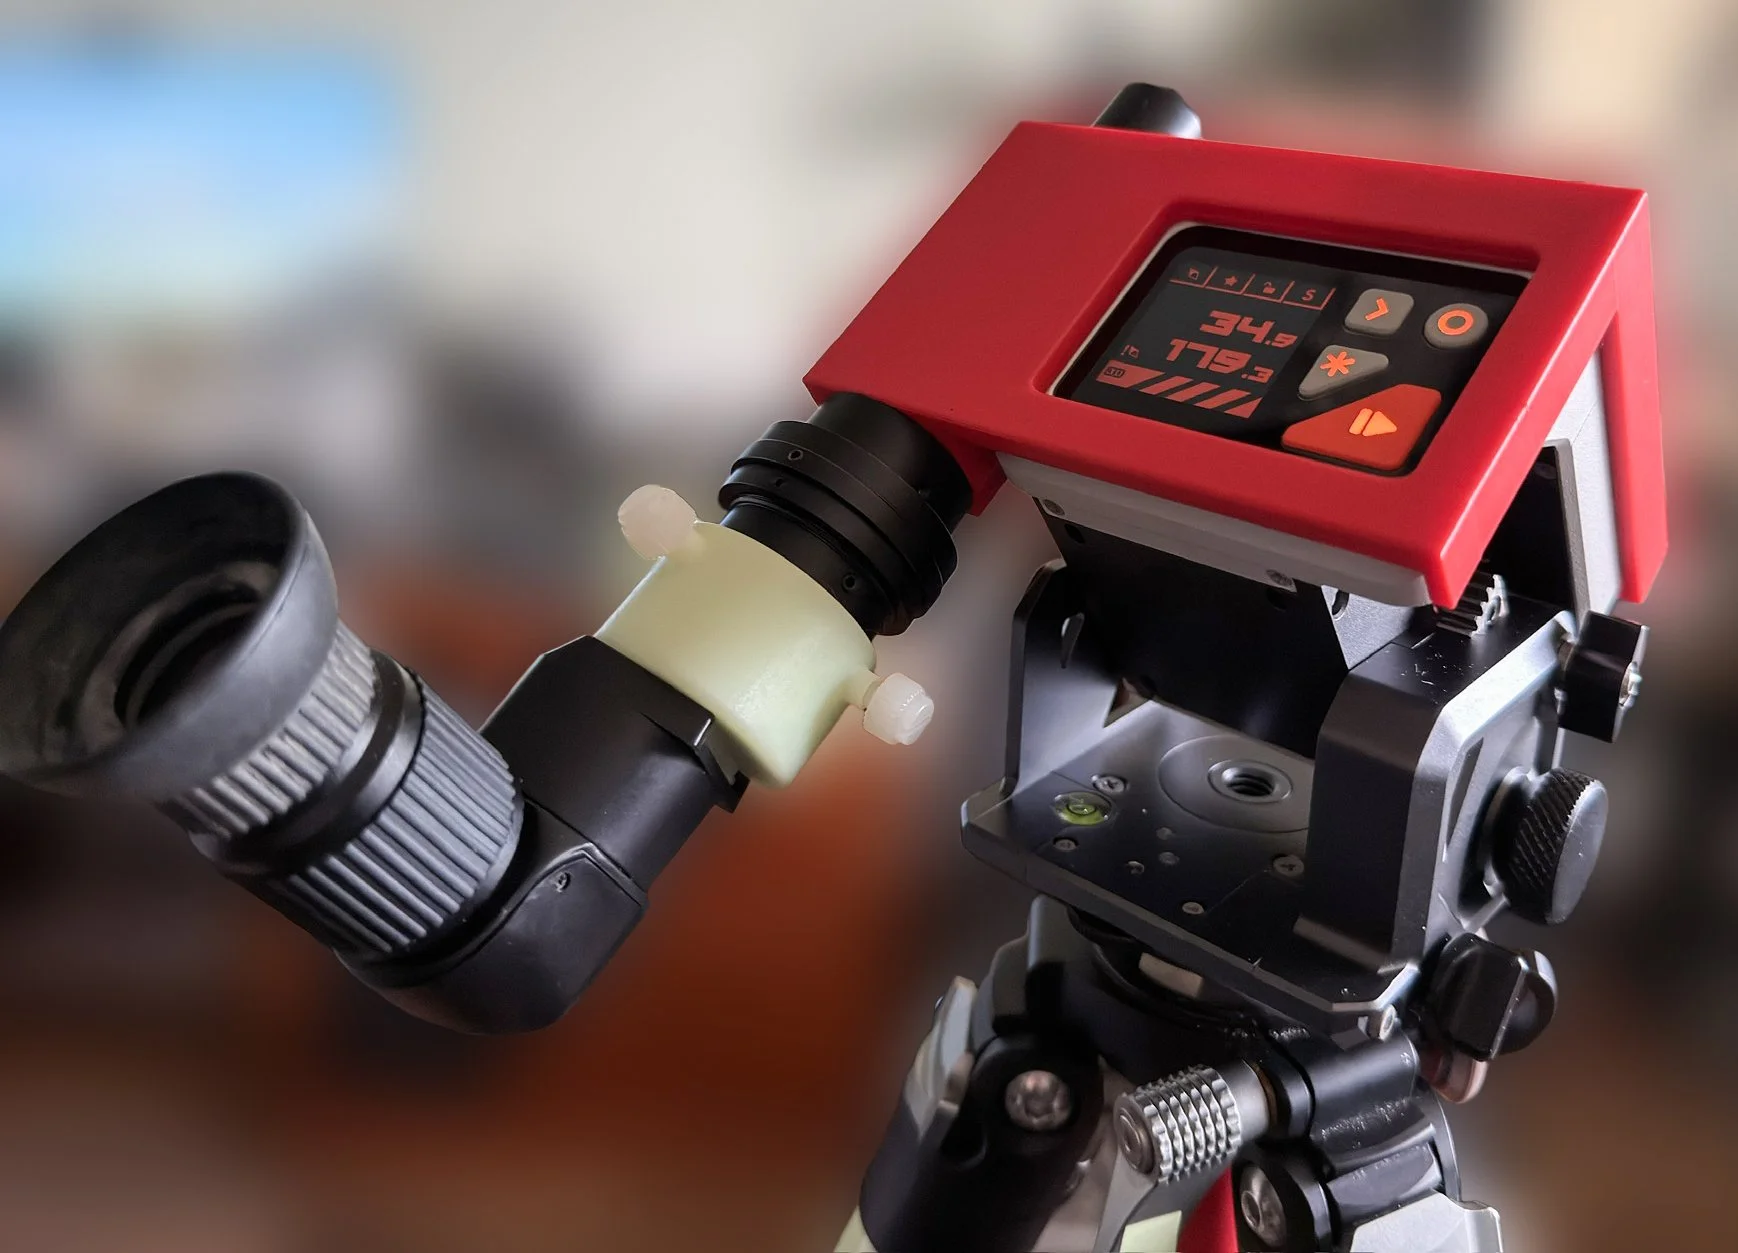
A polar scope mounted the Asterra tracker to do single star alignment in places where you can’t use a laser.
The new Asterra tracker has quite a lot going for it, but one of the significant frustrations is that the advanced single star alignment using the PlanIt Pro app requires the use of the laser, which is a definite no no in many countries, including here in Australia. This process is meant to give a much more accurate polar alignment than just using the inbuilt compass and inclinometer, theoretically allowing much longer tracking exposures. As always I had to find a way around this and the simplest idea was to design a 3d-printed bracket that could mount a polar scope.
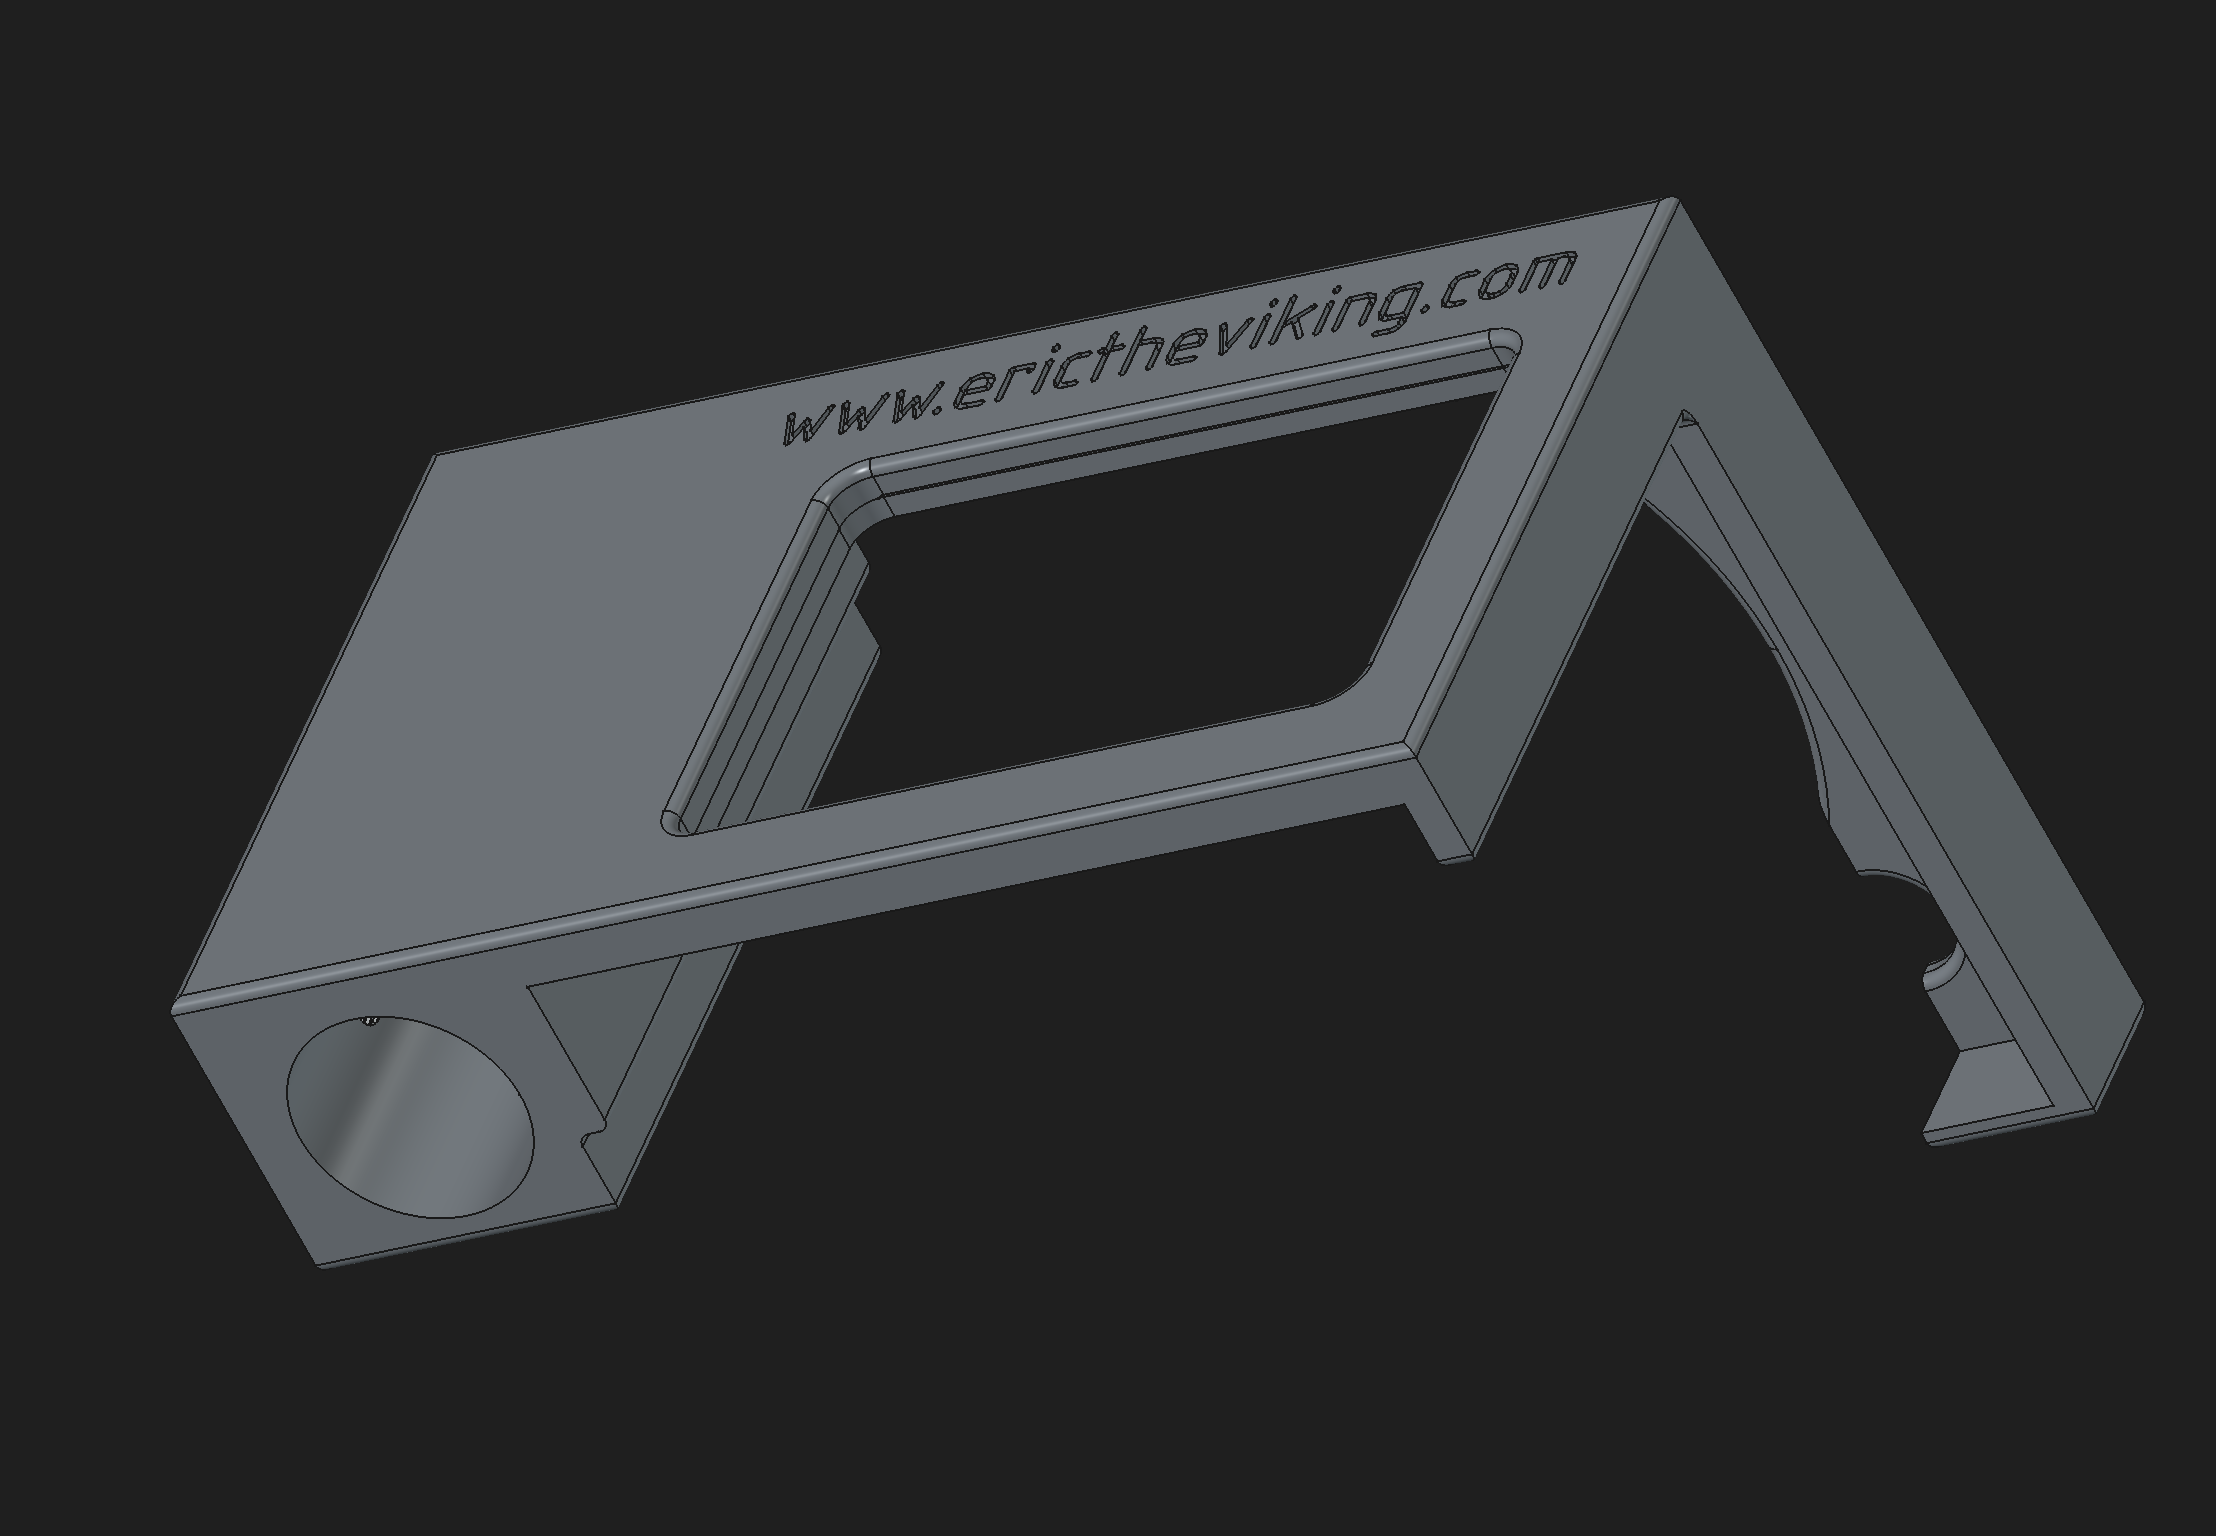
The 3d cad design of the bracket.
Using this I could follow the instructions and use the Polar Scope rather than the laser to align the unit with a designated guide star. Once this is done it is just a matter of reading off the altitude and azimuth from the Asterra unit, putting them into the PlanIt Pro app and then adjusting the alignment to the altitude and azimuth that the app gives you. Polar alignment done in less than 5 minutes. It is important to take the bracket and polar scope off the tracker before you mount the v-plate and camera so it does not get in the way, but this is a small thing.
Using my prototype polar scope bracket and the MSM polar scope I happened to have available I managed to align using both Venus and later in the evening Acrux with little effort and got good 2 minute tracks with a 50mm lens on a full frame camera. I think that rates as success. Assuming the weather eventually clears up I will do some more aggressive tests using longer lenses to see if I can match some of the claims northern hemisphere users have achieved using the app and laser option.
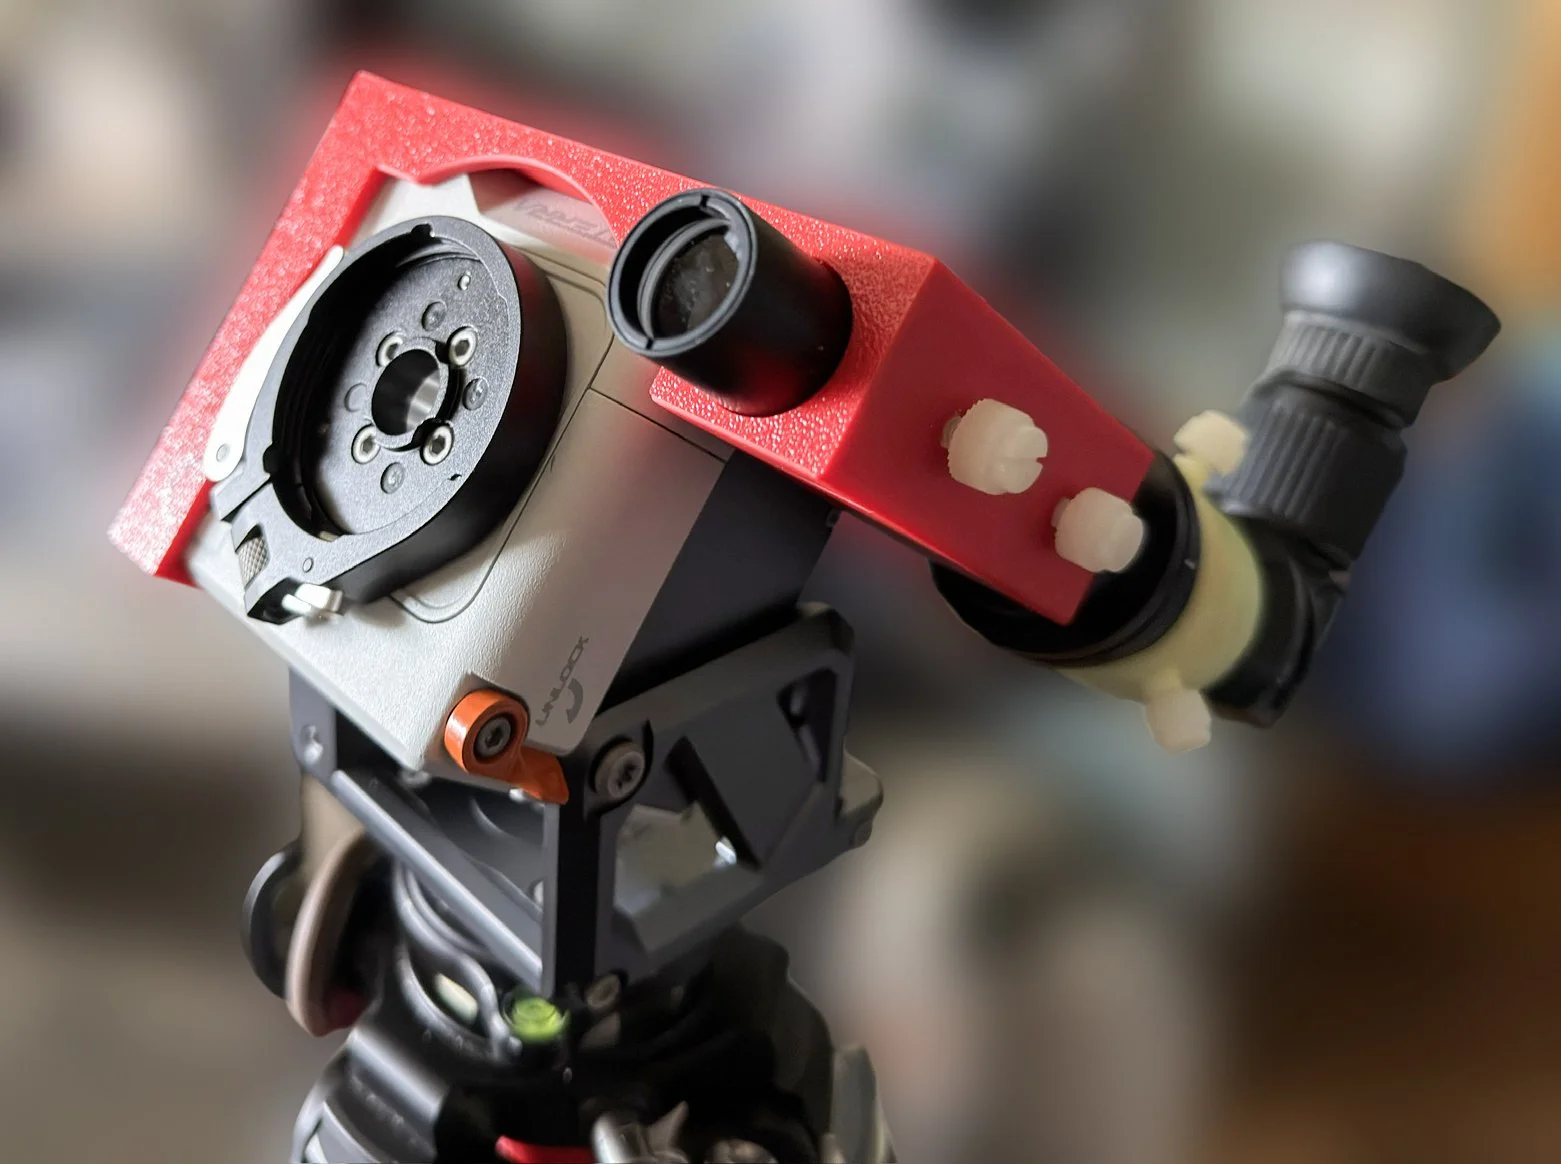
Another view of the polar scope and bracket mounted on the Asterra tracker.
As is usually the case for these kind of projects I am making the 3d-printer files available for free to download below. However there are a few warnings I need to give as this is still a prototype.
The bracket is designed to hold a polar scope with a 19.2 mm external barrel diameter at least 70mm long. This just happens to be the diameter and length of the MSM polarscope I have. It will not accept larger diameter scopes, although a slightly smaller one will probably be ok as the holding screws will keep it in lace and aligned. If there is enough demand I will resign the holder component to be more universal.
It needs two M4×8mm nylon thumb screws (I just buy them from amazon) to hold the polar scope in place. The quality of 3-d printed threads varies depending on the printer so to ensure a smooth fit it is worth running a M4 tap through each hole before trying to insert the nylon thumbscrews. If you don’t have a M4 tap then just screwing in any metal M4 bolt should do the job as well.
I am not after any payment for this design, just sharing it with like minded people in case it is useful. Happy if you give me a follow on instagram and Facebook or subscribe to my YouTube channel in return. If you really want to show me you appreciate my efforts buy me a coffee here. But I do ask that you do not pass it on or upload the design to any sites for further distribution. If you know anyone interested just point them at me.
I will be updating the design as things occur to me so check on this blog occasionally..
When printing, make sure you use supports. I generally print things in PLA, with a wall thickness of 3 and 30% infil using a gyroid patern.
Finally, get out, look at the universe, take some photos and have fun. It really is worth it.
You can download the STL file at this link.