Update 14 July 2026, I have posted a YouTube video demonstrating the app at this link
It is no exaggeration to say that I have put a lot of work into perfecting my workflow to use phone apps like Sky Safari and Photopills to polar align my star tracker. This is mostly because here in the southern hemisphere we don’t have a nice polestar to align to (and we can’t use lasers anyway in Australia) and the Octans (the stars we can use with a polarscope) are quite faint and can be difficult to see (and polar scopes are hard on the back anyway). While I and many others have had lots of success using phone apps for this purpose we are all plagued by unsteady phone compasses and stray magnetic fields degrading our efforts.
The developer of Polar Scope Align Pro (PSAP), currently an iPhone only app (but the Android version is coming), seems to have essentially solved these problems and given us a way to accurately calibrate the direction finding on our phones for a much more accurate polar alignment.
Essentially the process is you point the phone at a known bright star or planet and the app, using the GPS location and time, calibrates the phone gyros so that it can identify the direction the phone is pointing much more accurately. This means you are not relying on the vagaries of the earths magnetic fields. Using this process on my first very quick try, with Venus to calibrate my phone, I was able to do 10 minute long tracked images with a 50mm lens. Pretty impressive by any standards. Below I will take you through the steps to use this app and show you some of my first test mages.
Quick disclaimer, PSAP is a paid app but I think it is worth the cost. I have absolutely no relationship with the developer and only noticed the new features when the app updated on my phone.
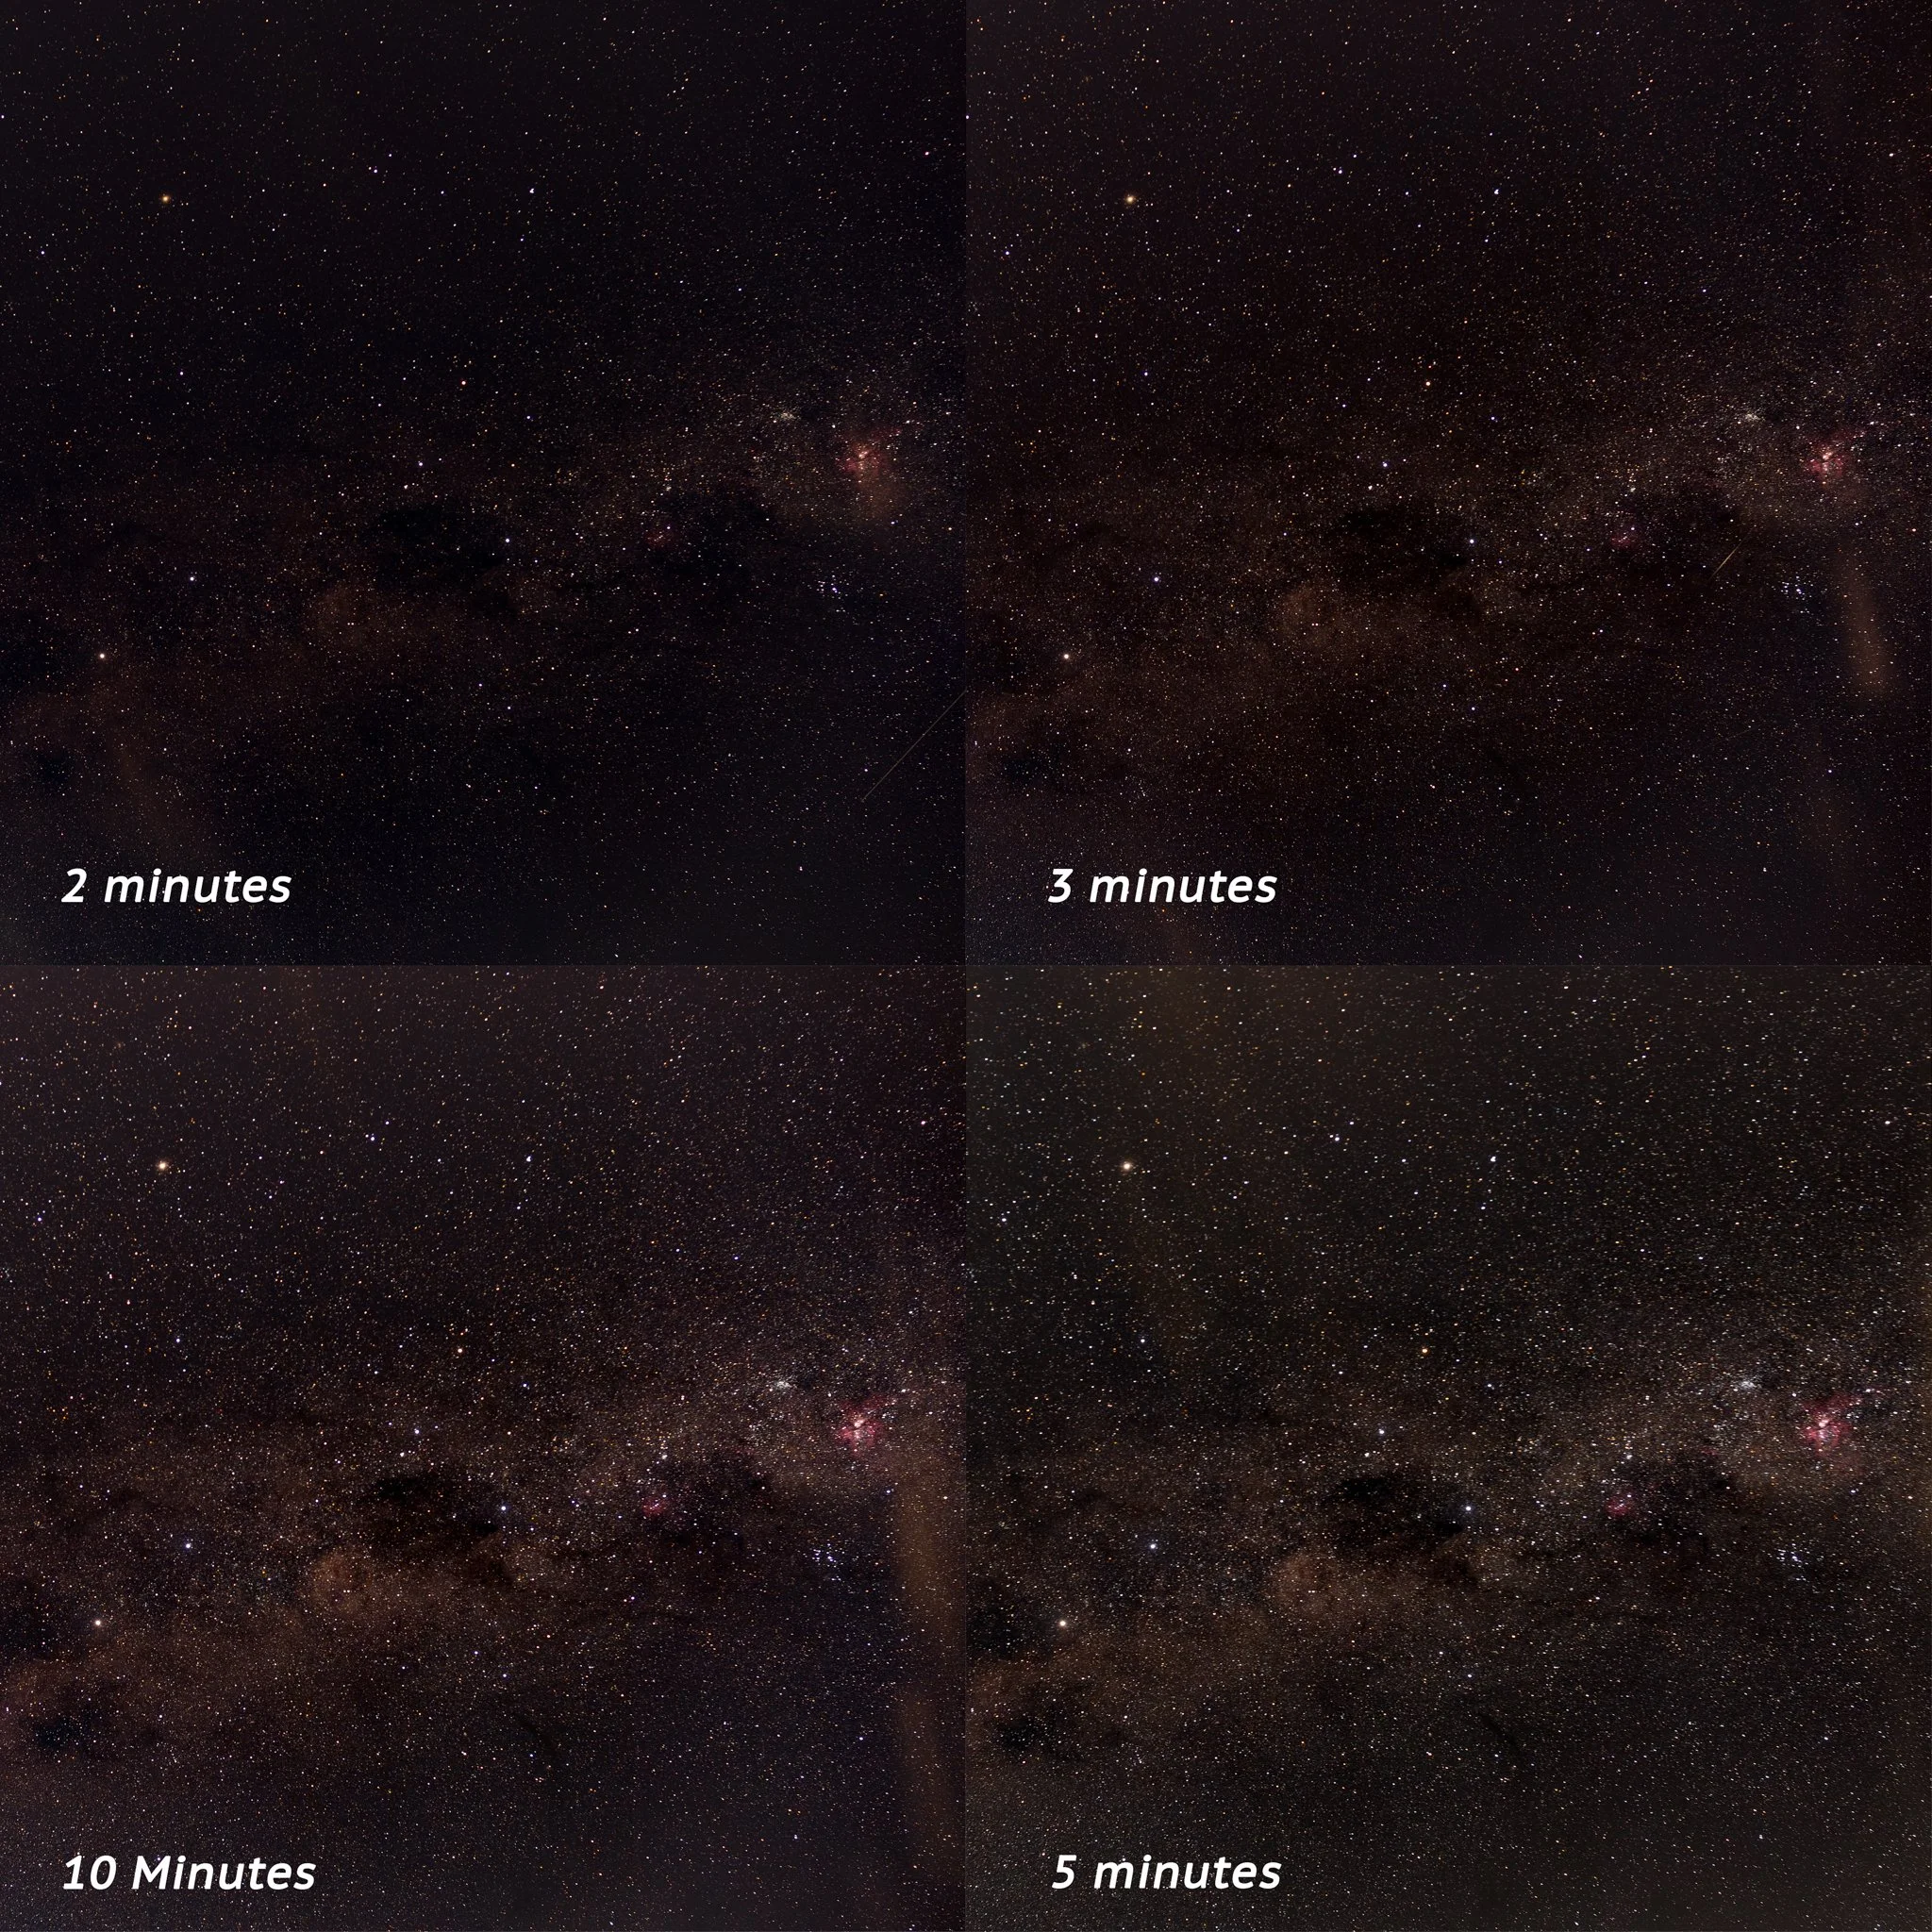
My first quick test images after polar aligning with the PSAP app. Done with a 20 mm lens and cropped into about 100%. All are acceptable as far as star trailing is concerned.
The first step is obviously open the app where you will be presented with the screen below. Remember we are doing this before we mount the phone on the tracker.
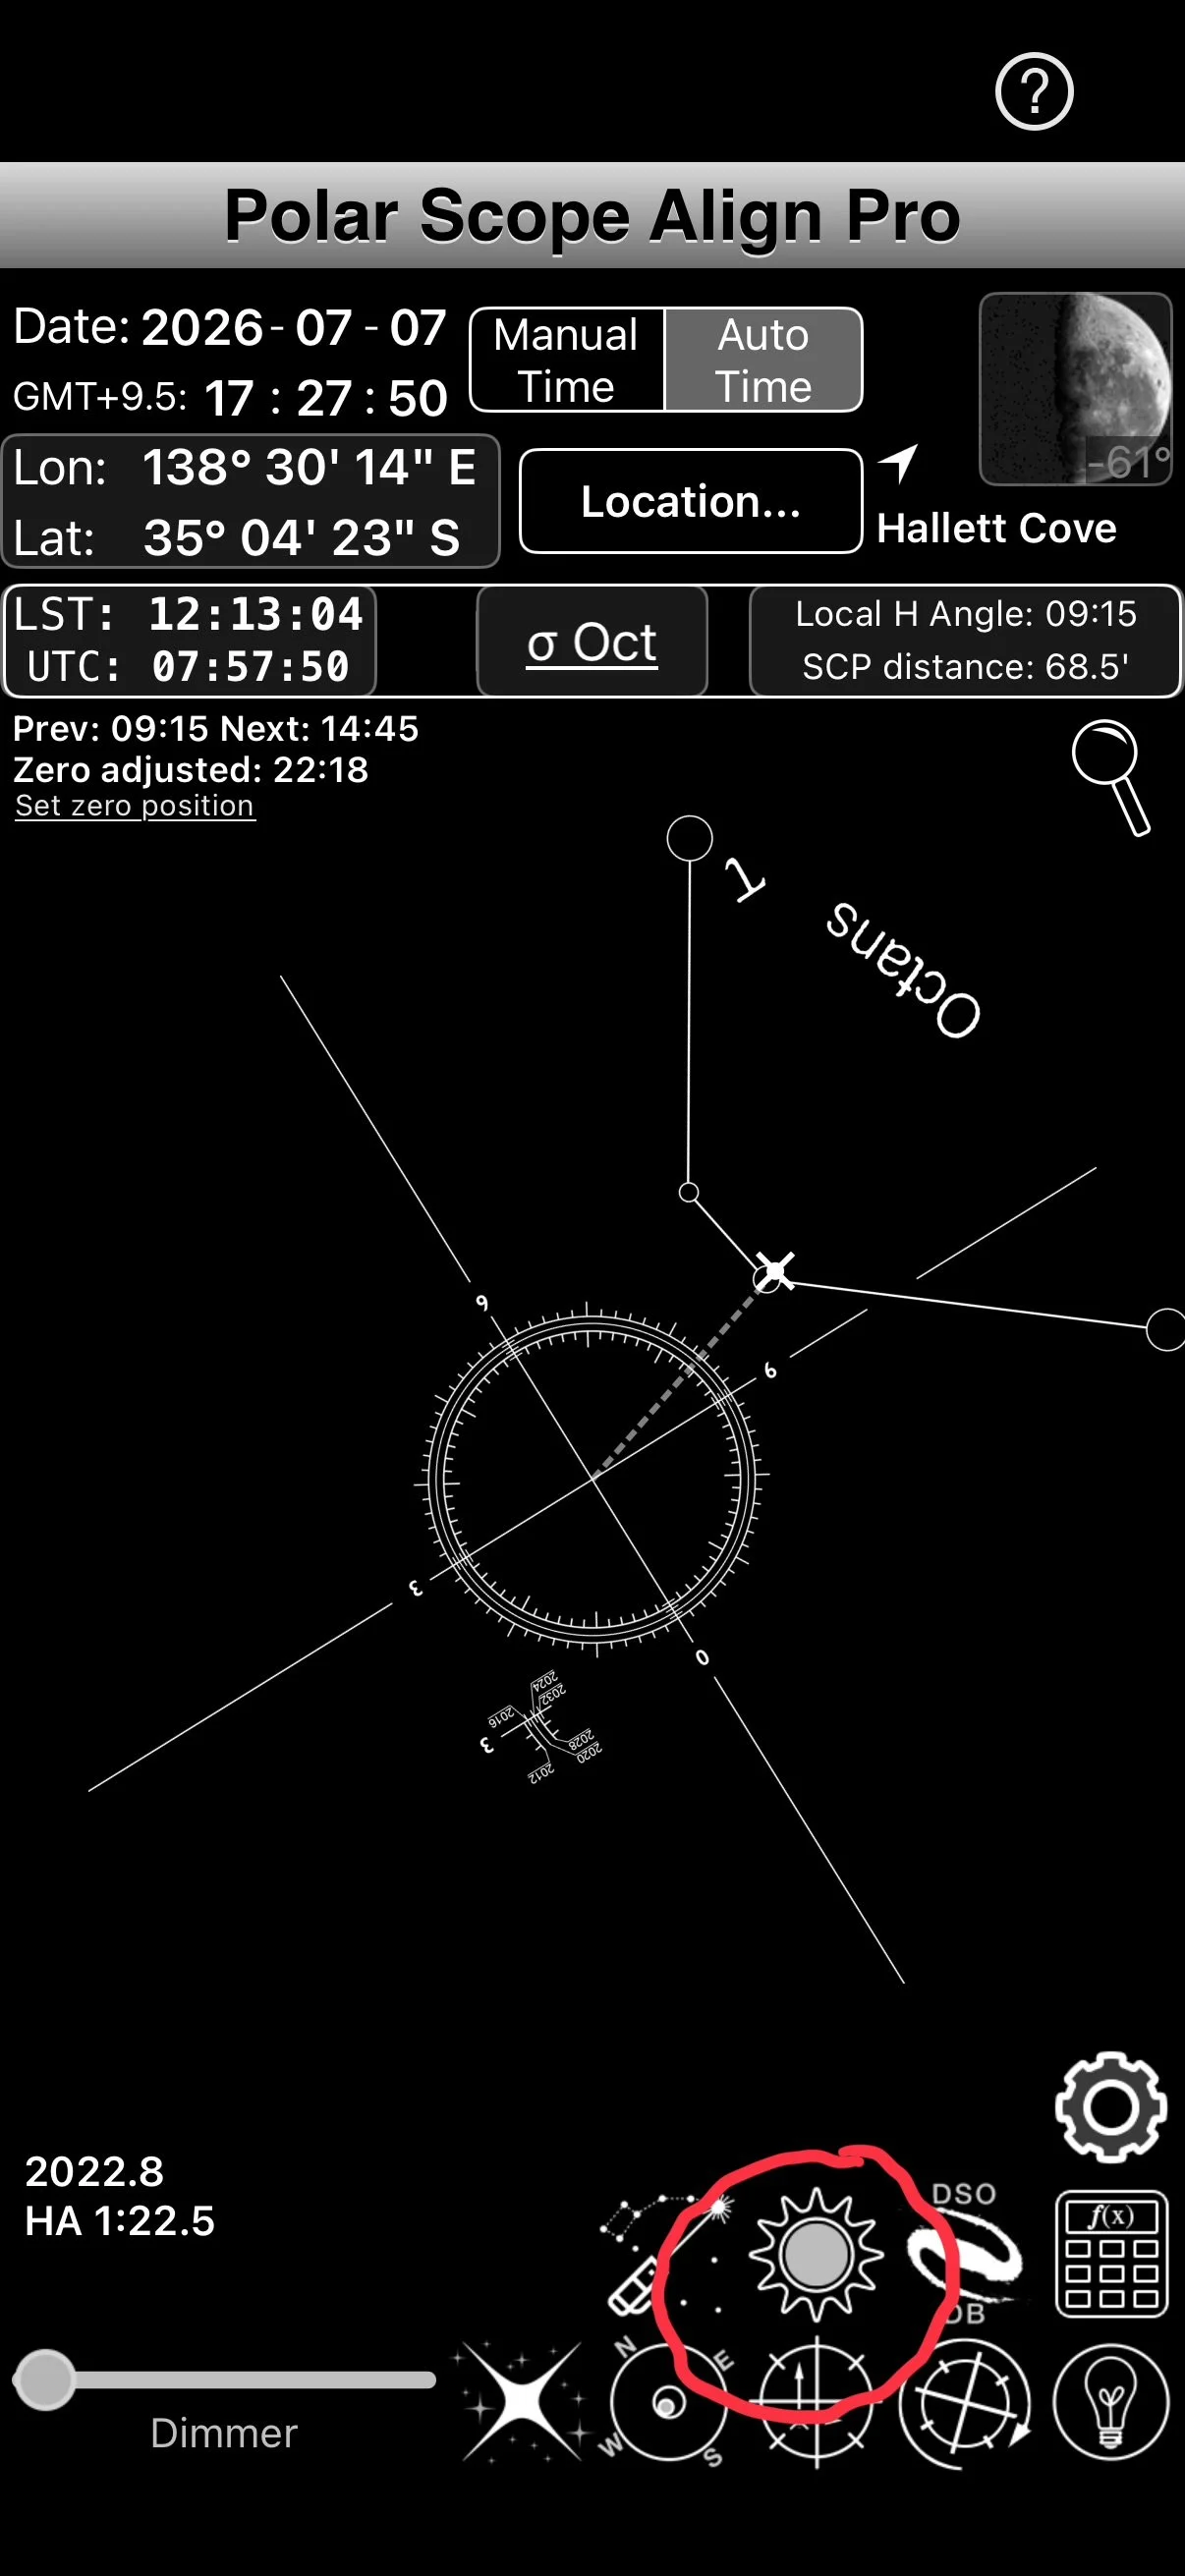
Choose the sun symbol to go to Daytime/No Polarscope screen.
This looks quite complicated, but we don’t need most of it for our current purpose (but it is really worthwhile to investigate some of the other abilities of the app, it really is very impressive). We want to choose the daytime alignment (the sun symbol) option on the bottom right of the screen, even though you are probably polar aligning at night 🙂. From here you will get something like the following screen.
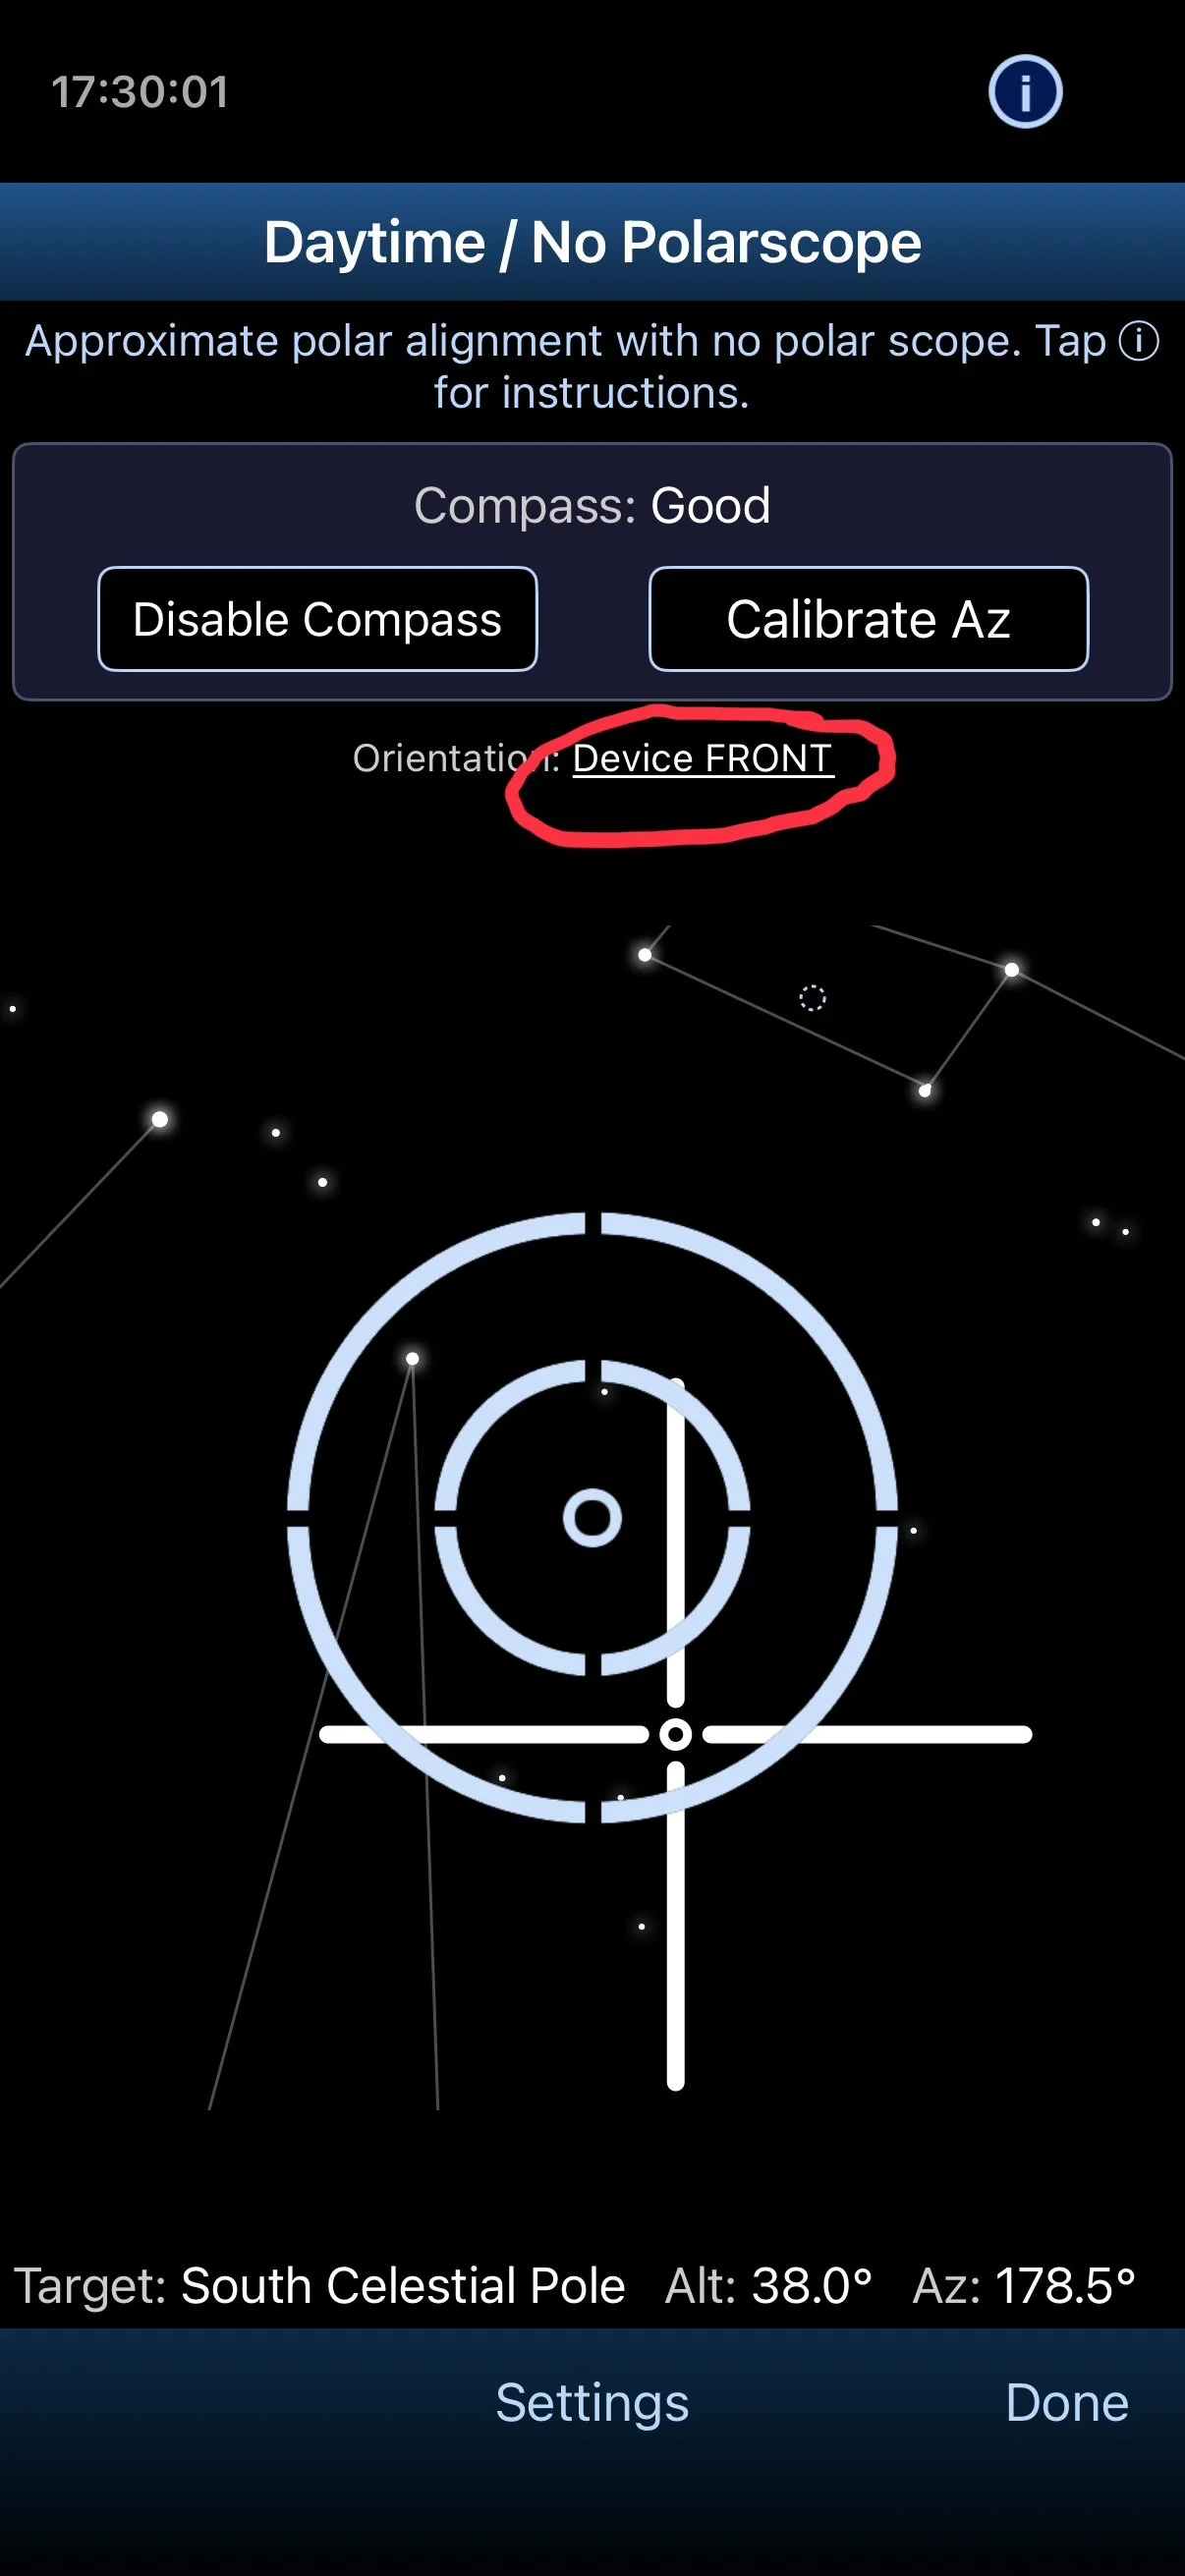
It is important at this stage to set the correct phone orientation for your setup using the Orientation option just below the Disable Compass and Calibrate Az buttons. This will take you to the following screen.
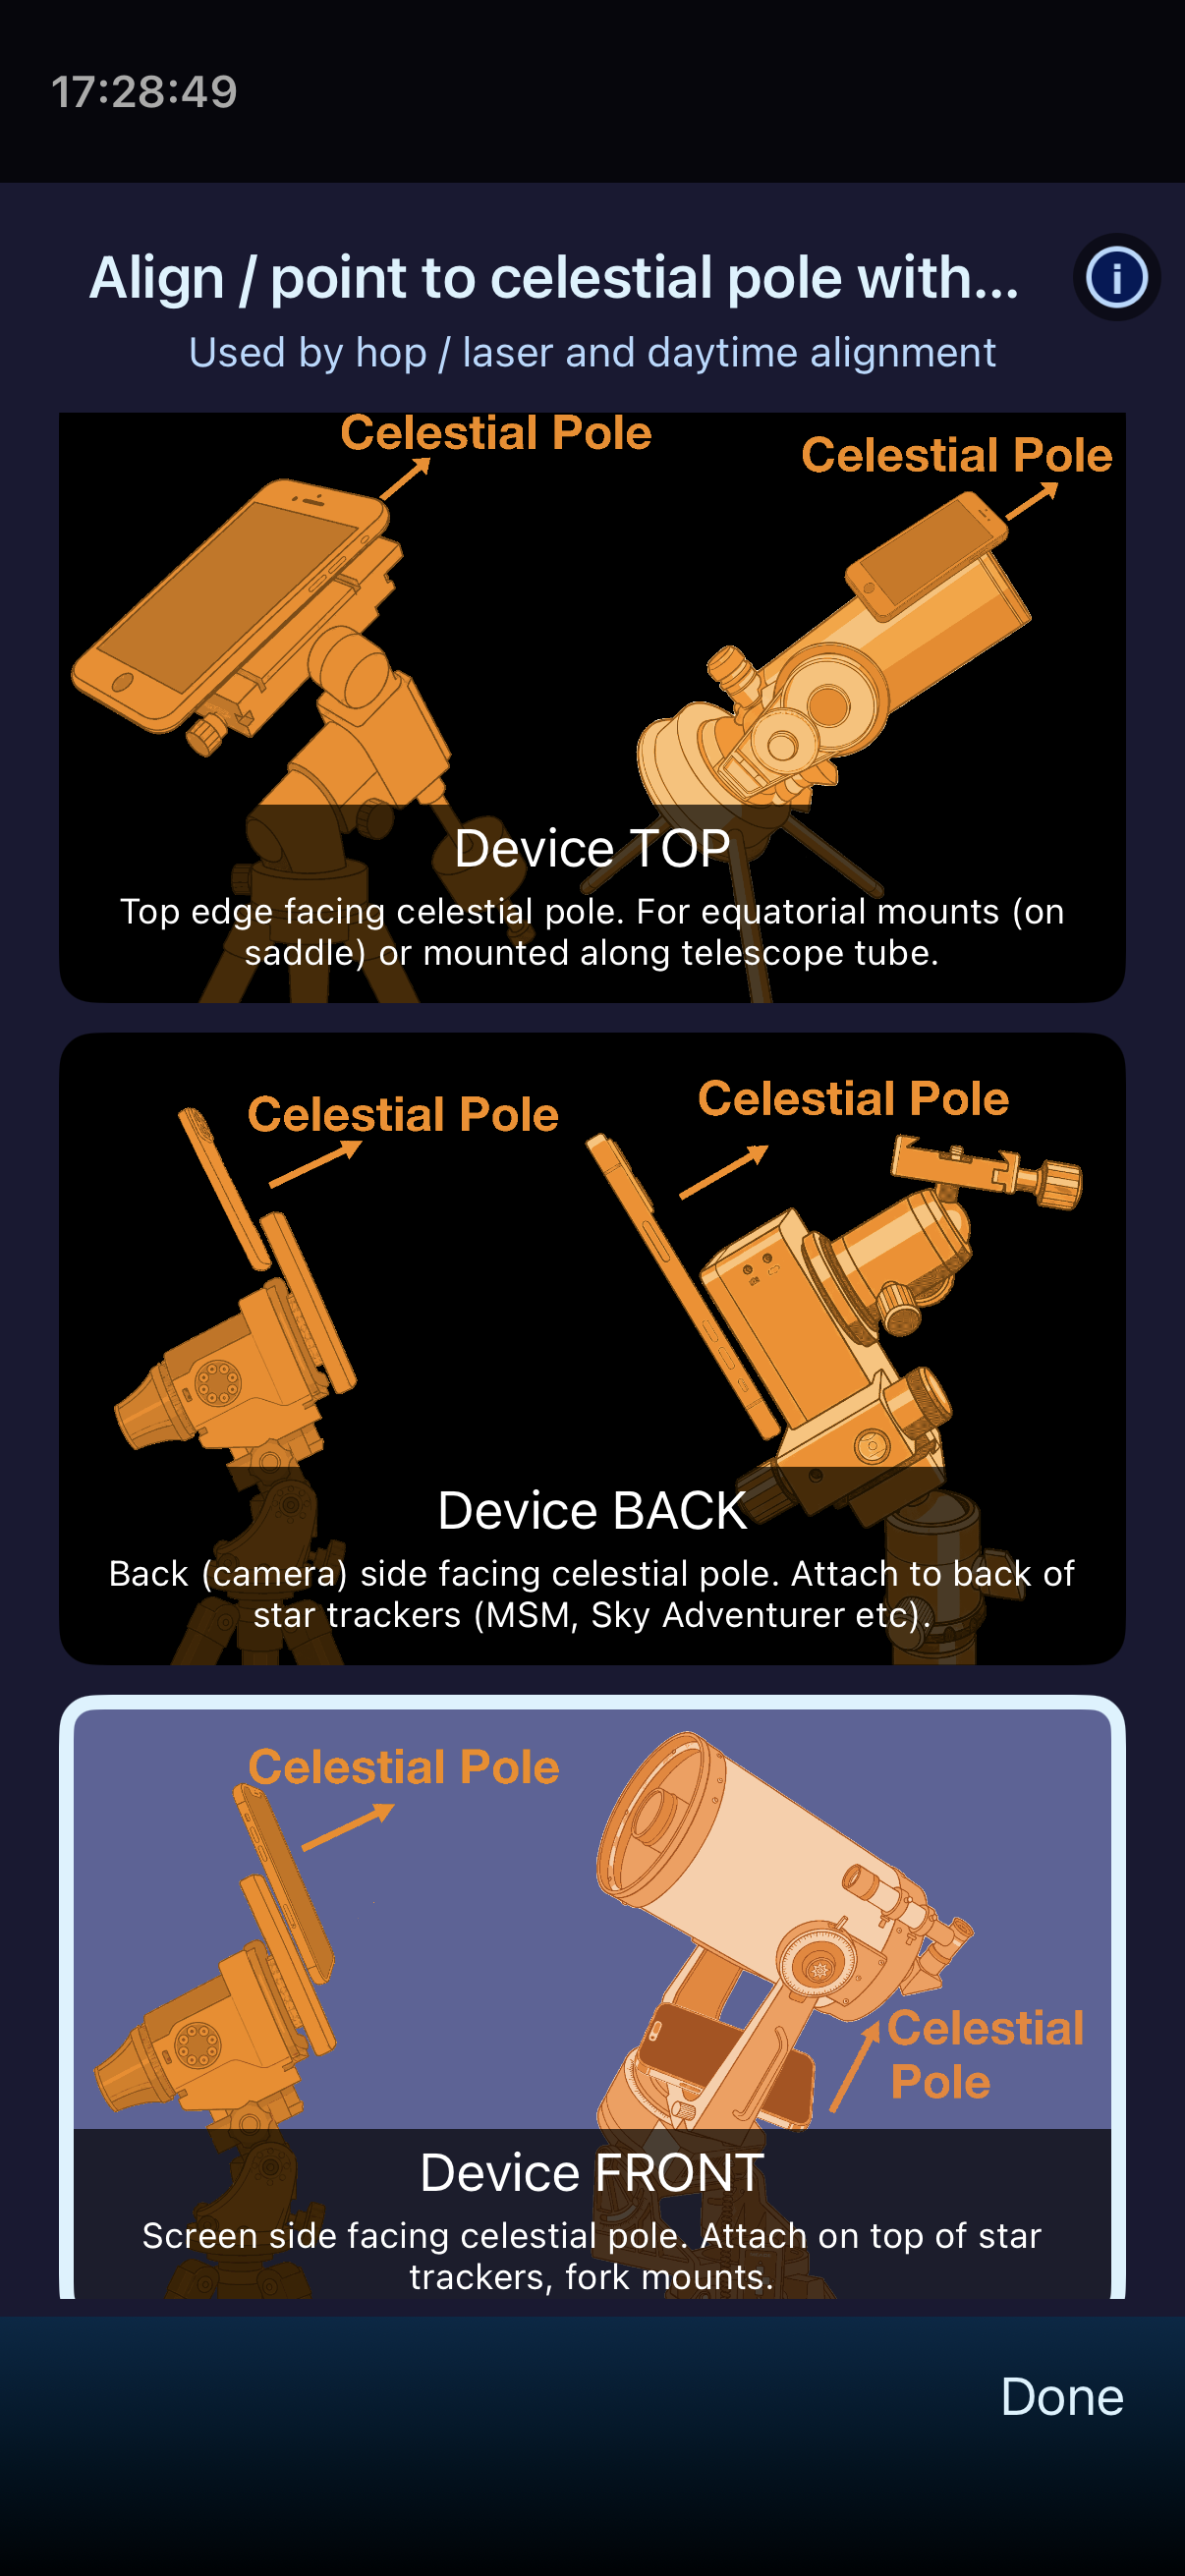
Choosinng the orientation of your phone in relation to your tracker.
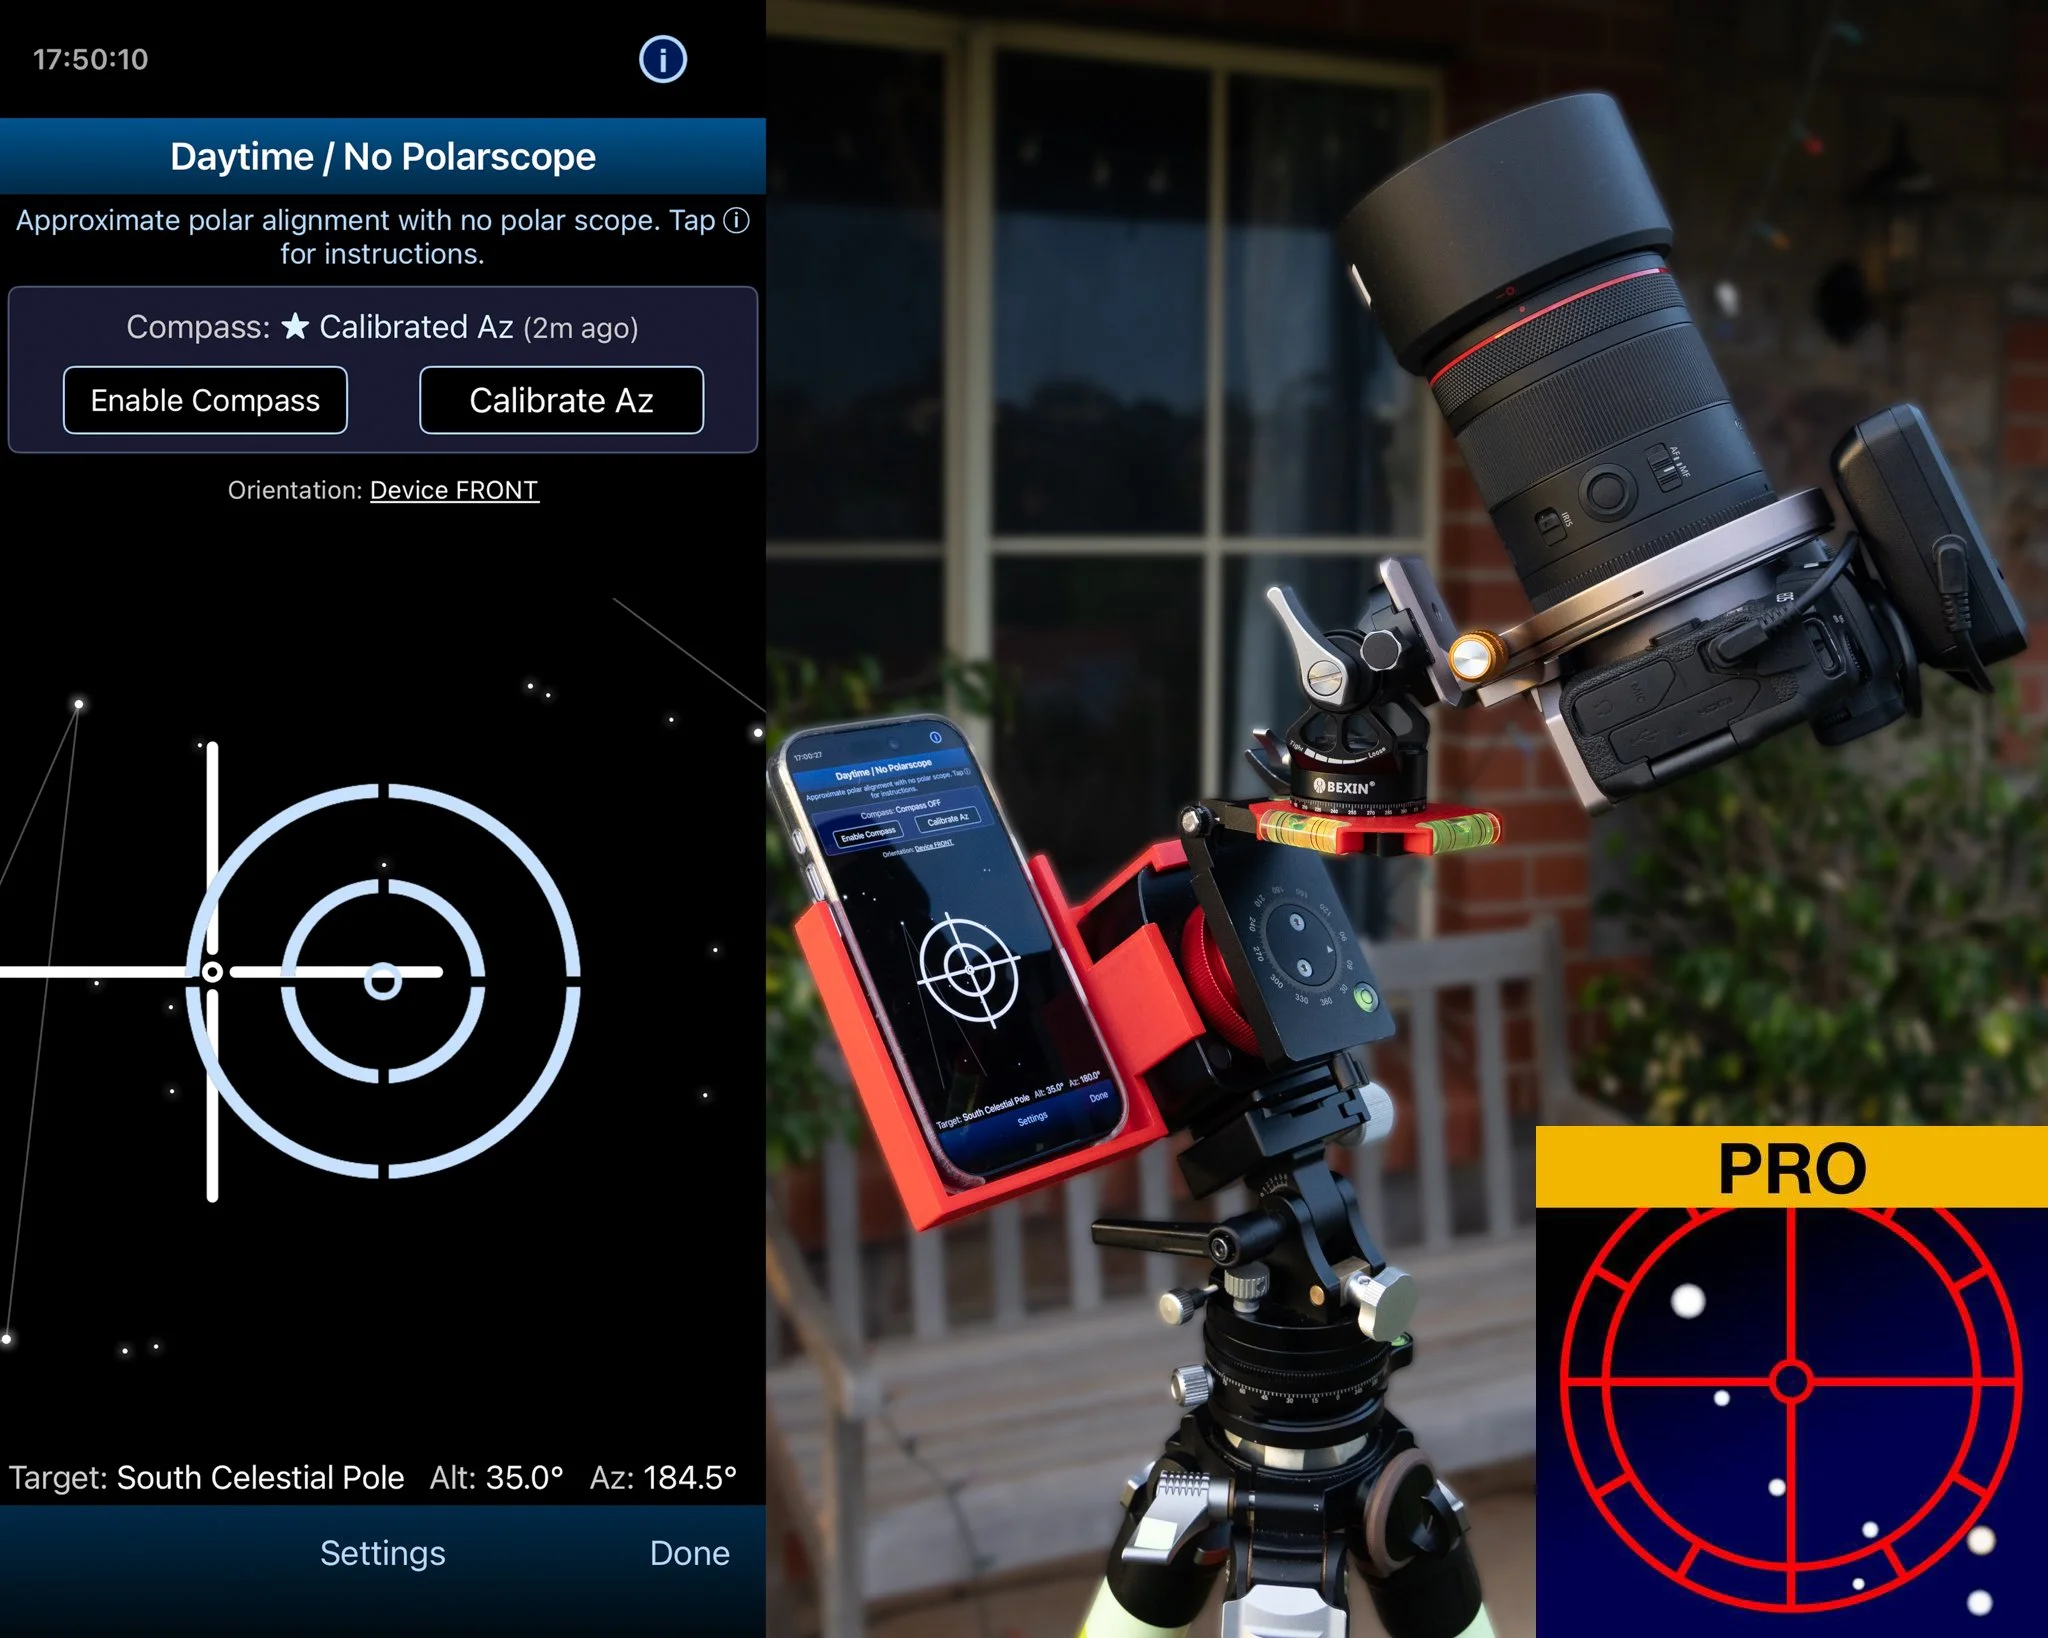
If you are using a phone bracket like mine below with the face of the phone pointing up towards the celestial pole then choose the Device Front option at the bottom.
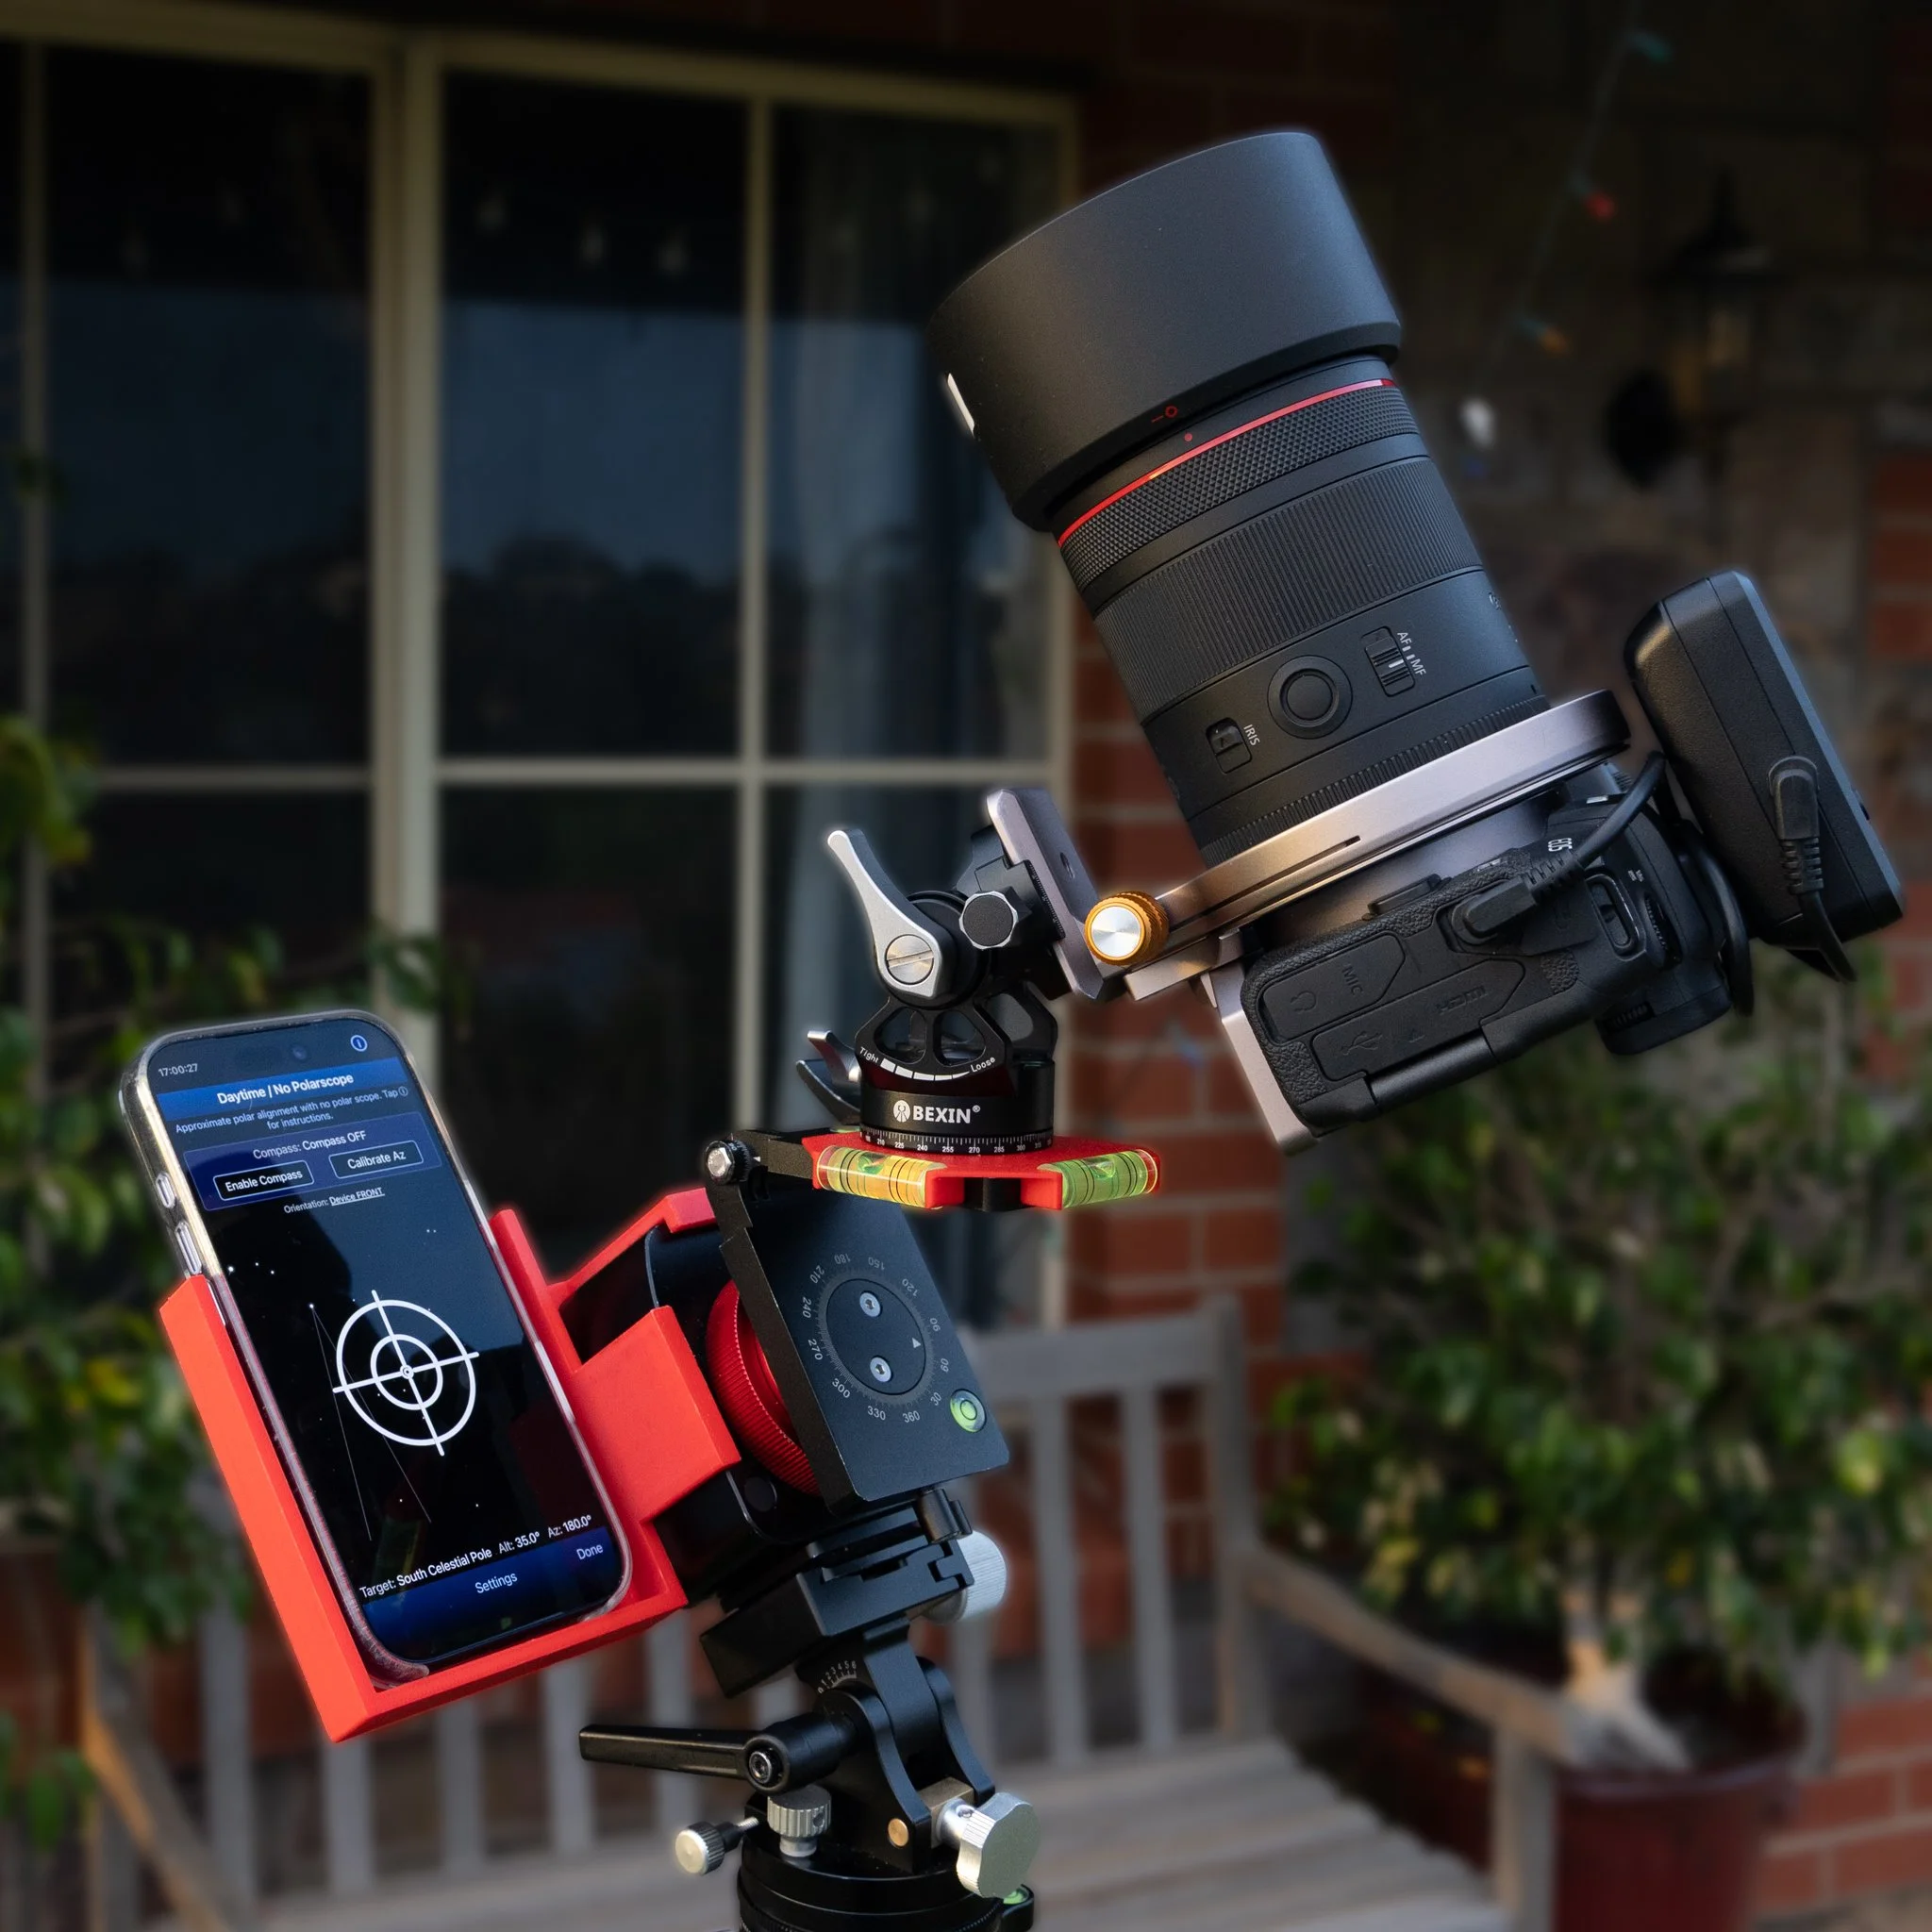
My current standard setup for doing tracked panoramas.
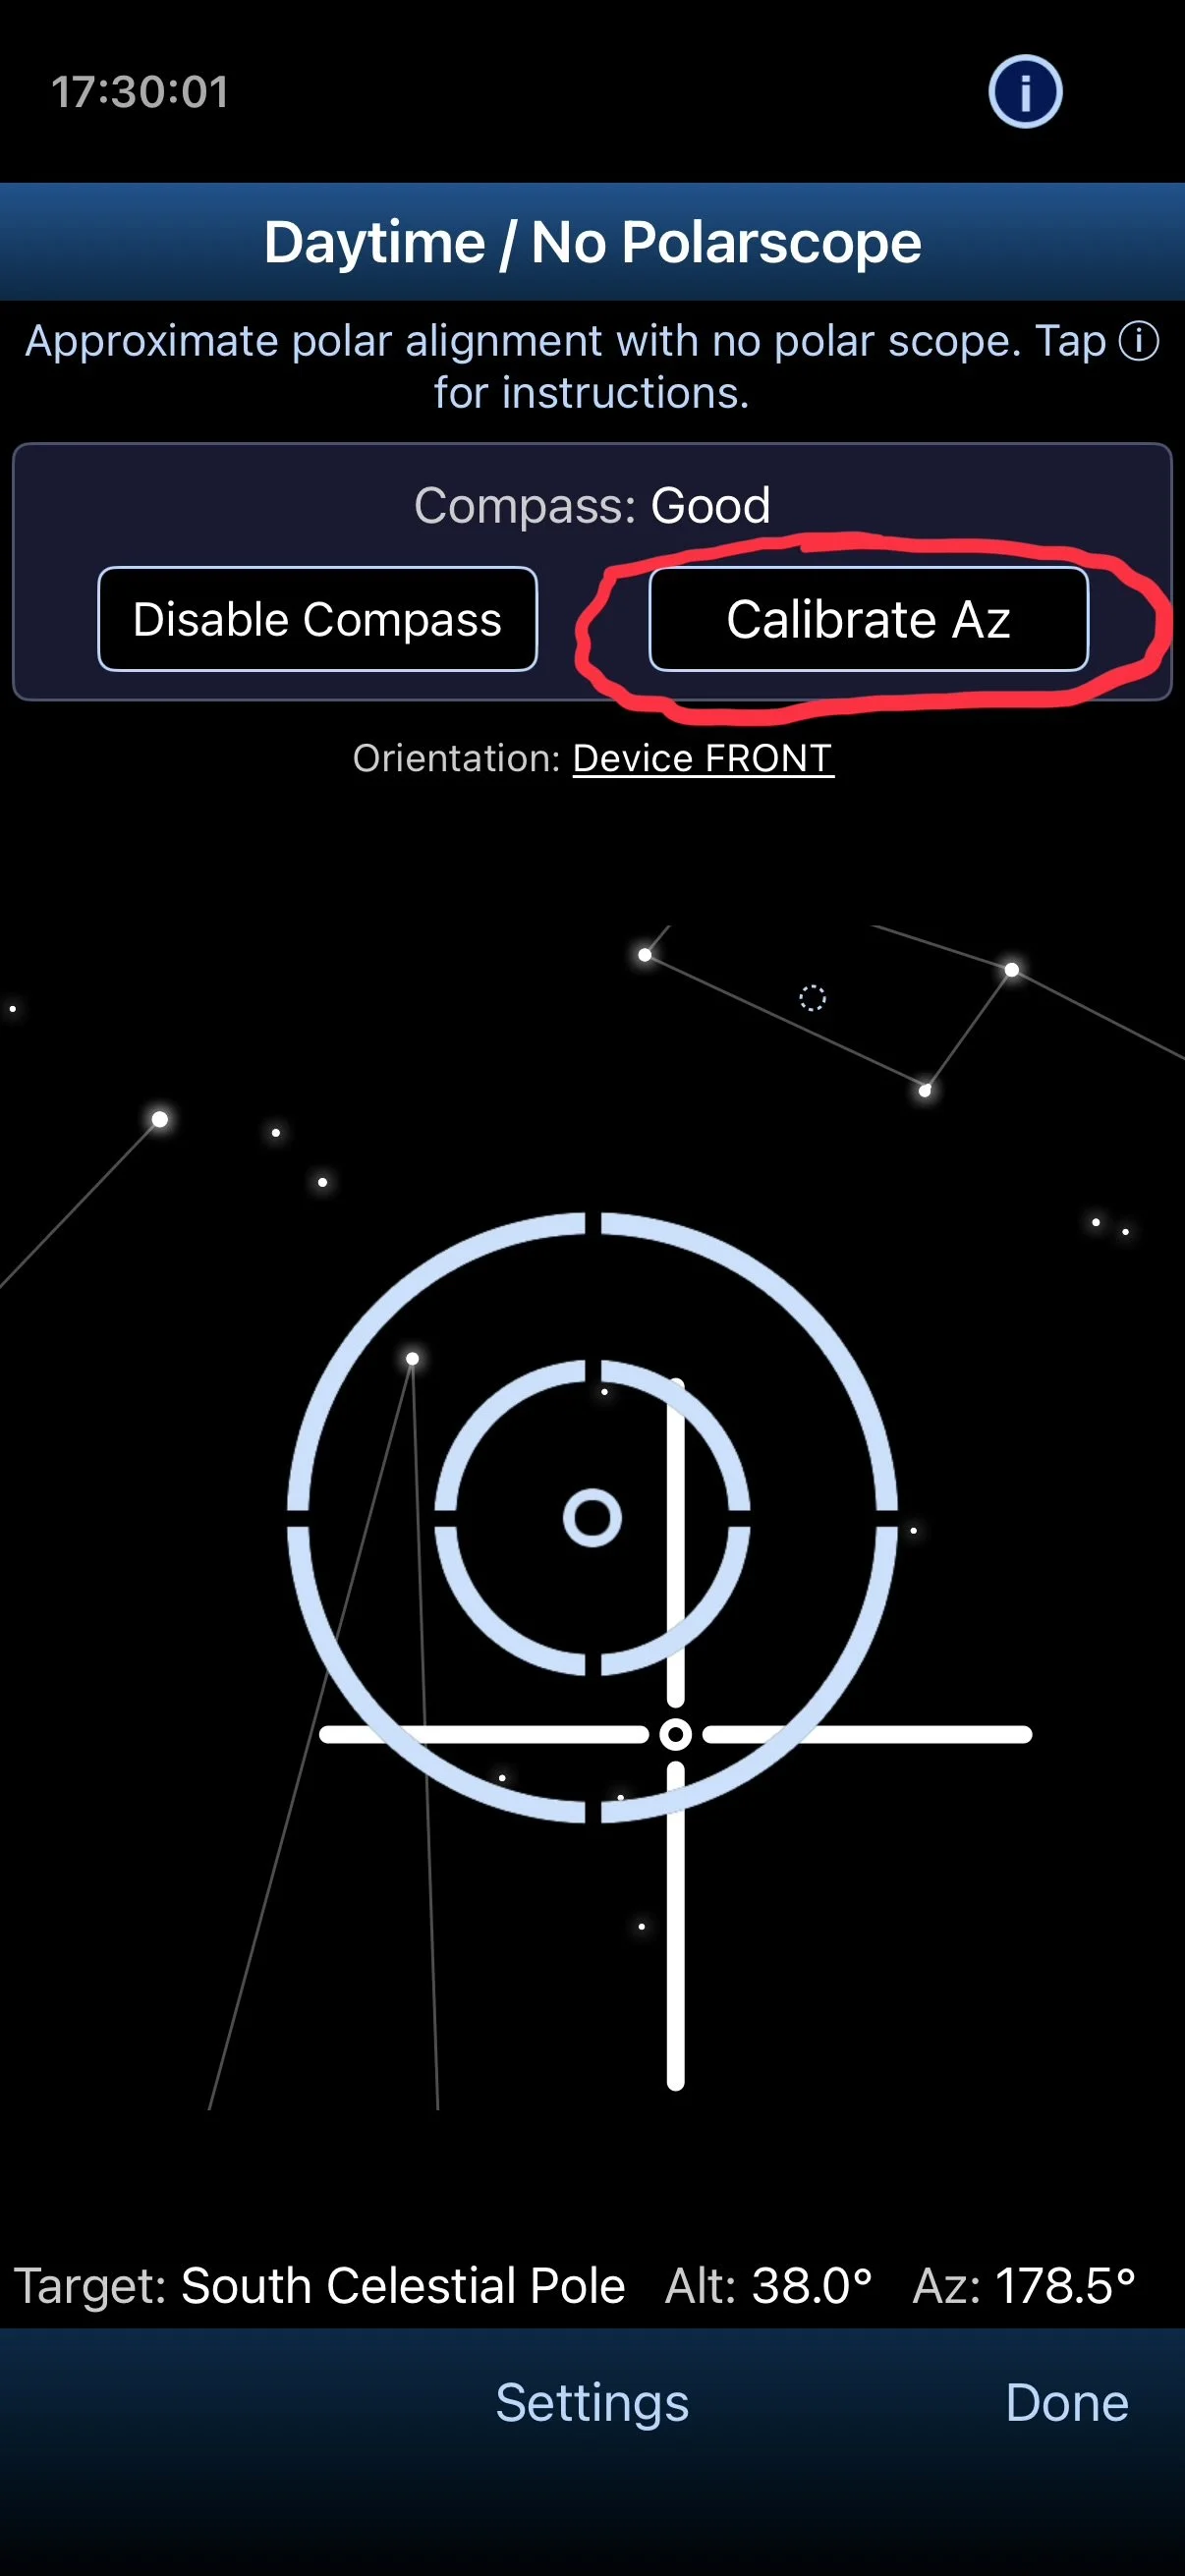
Click Done, and it will take you back to the Daytime / No Polarscope screen. Now choose Calibrate Az button circled below.
This will take you to the Azimuth Calibration screen and a list of bright objects you can use to calibrate. The app is smart enough to show you only ones likely to be visible in your location (during daytime you will only see the sun listed). If you are not sure what to choose, hold your phone up towards the sky just above the horizon and it will show the objects in that part of the sky (very clever and handy). In this example I selected Venus getting the screen below.
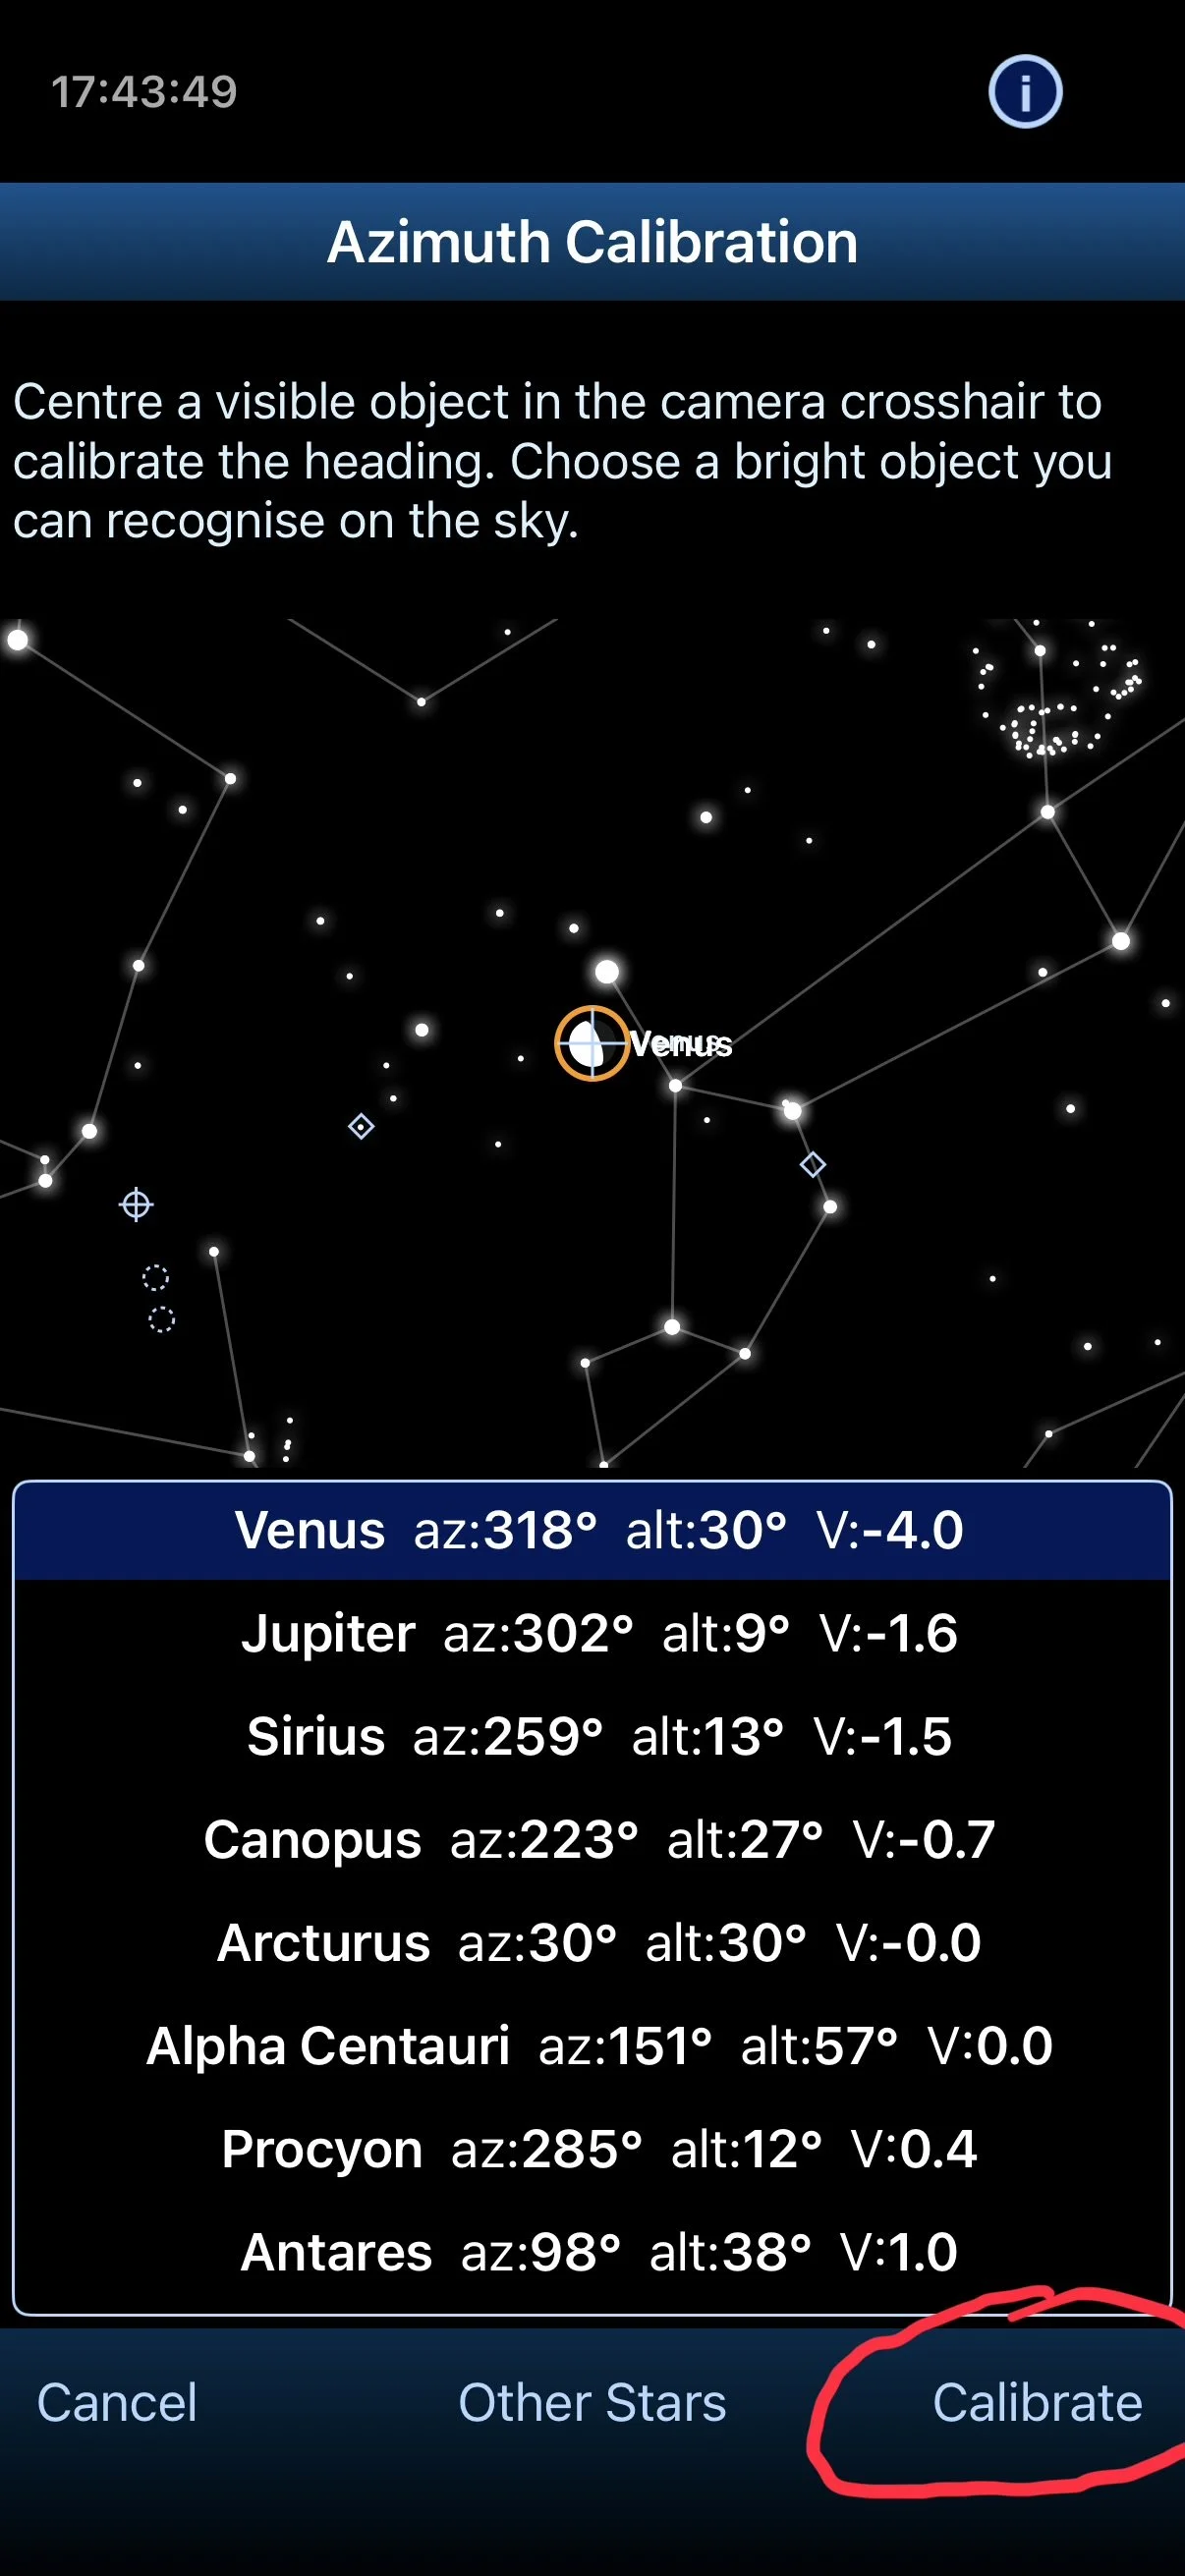
From here click on Calibrate and it will take you to the camera view below.
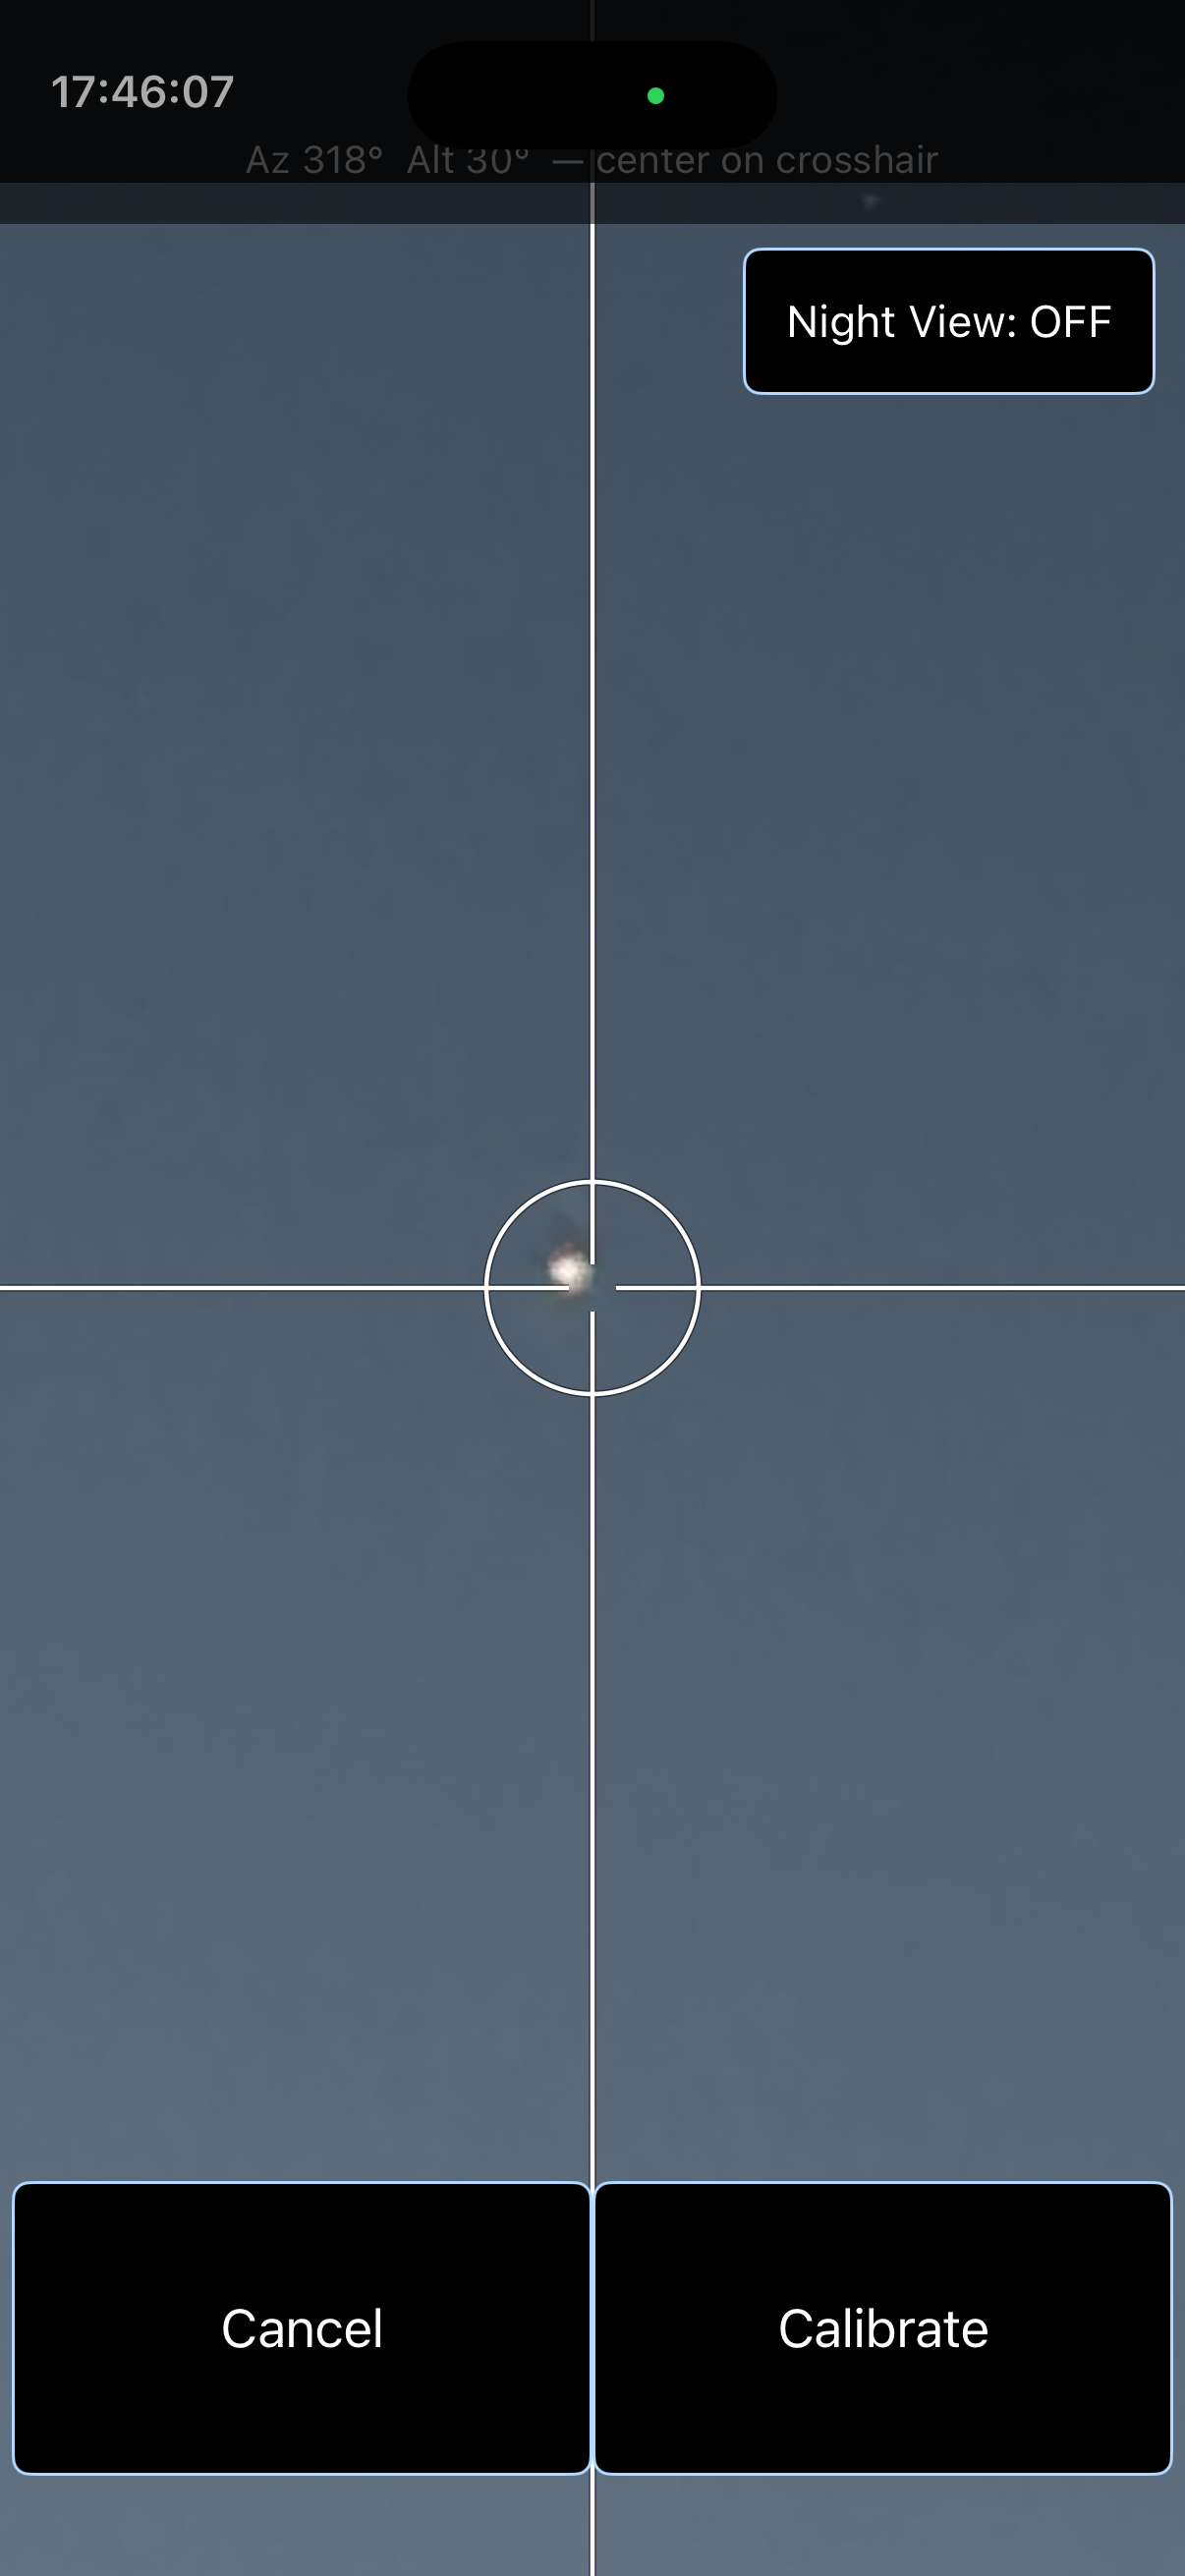
This is the zoomed in view of Venus
Zoom in by pinching out on the screen so that you are looking at a smaller field of view (this will give you a more accurate result). Centre the chosen object in the cross hair. It can be a little difficult to hold the phone steady to keep the object from jumping around, but with a little practice and perhaps a solid object to hold your phone against you will find it is not too hard. Once centered touch Calibrate and it will change to a still image of your alignment.
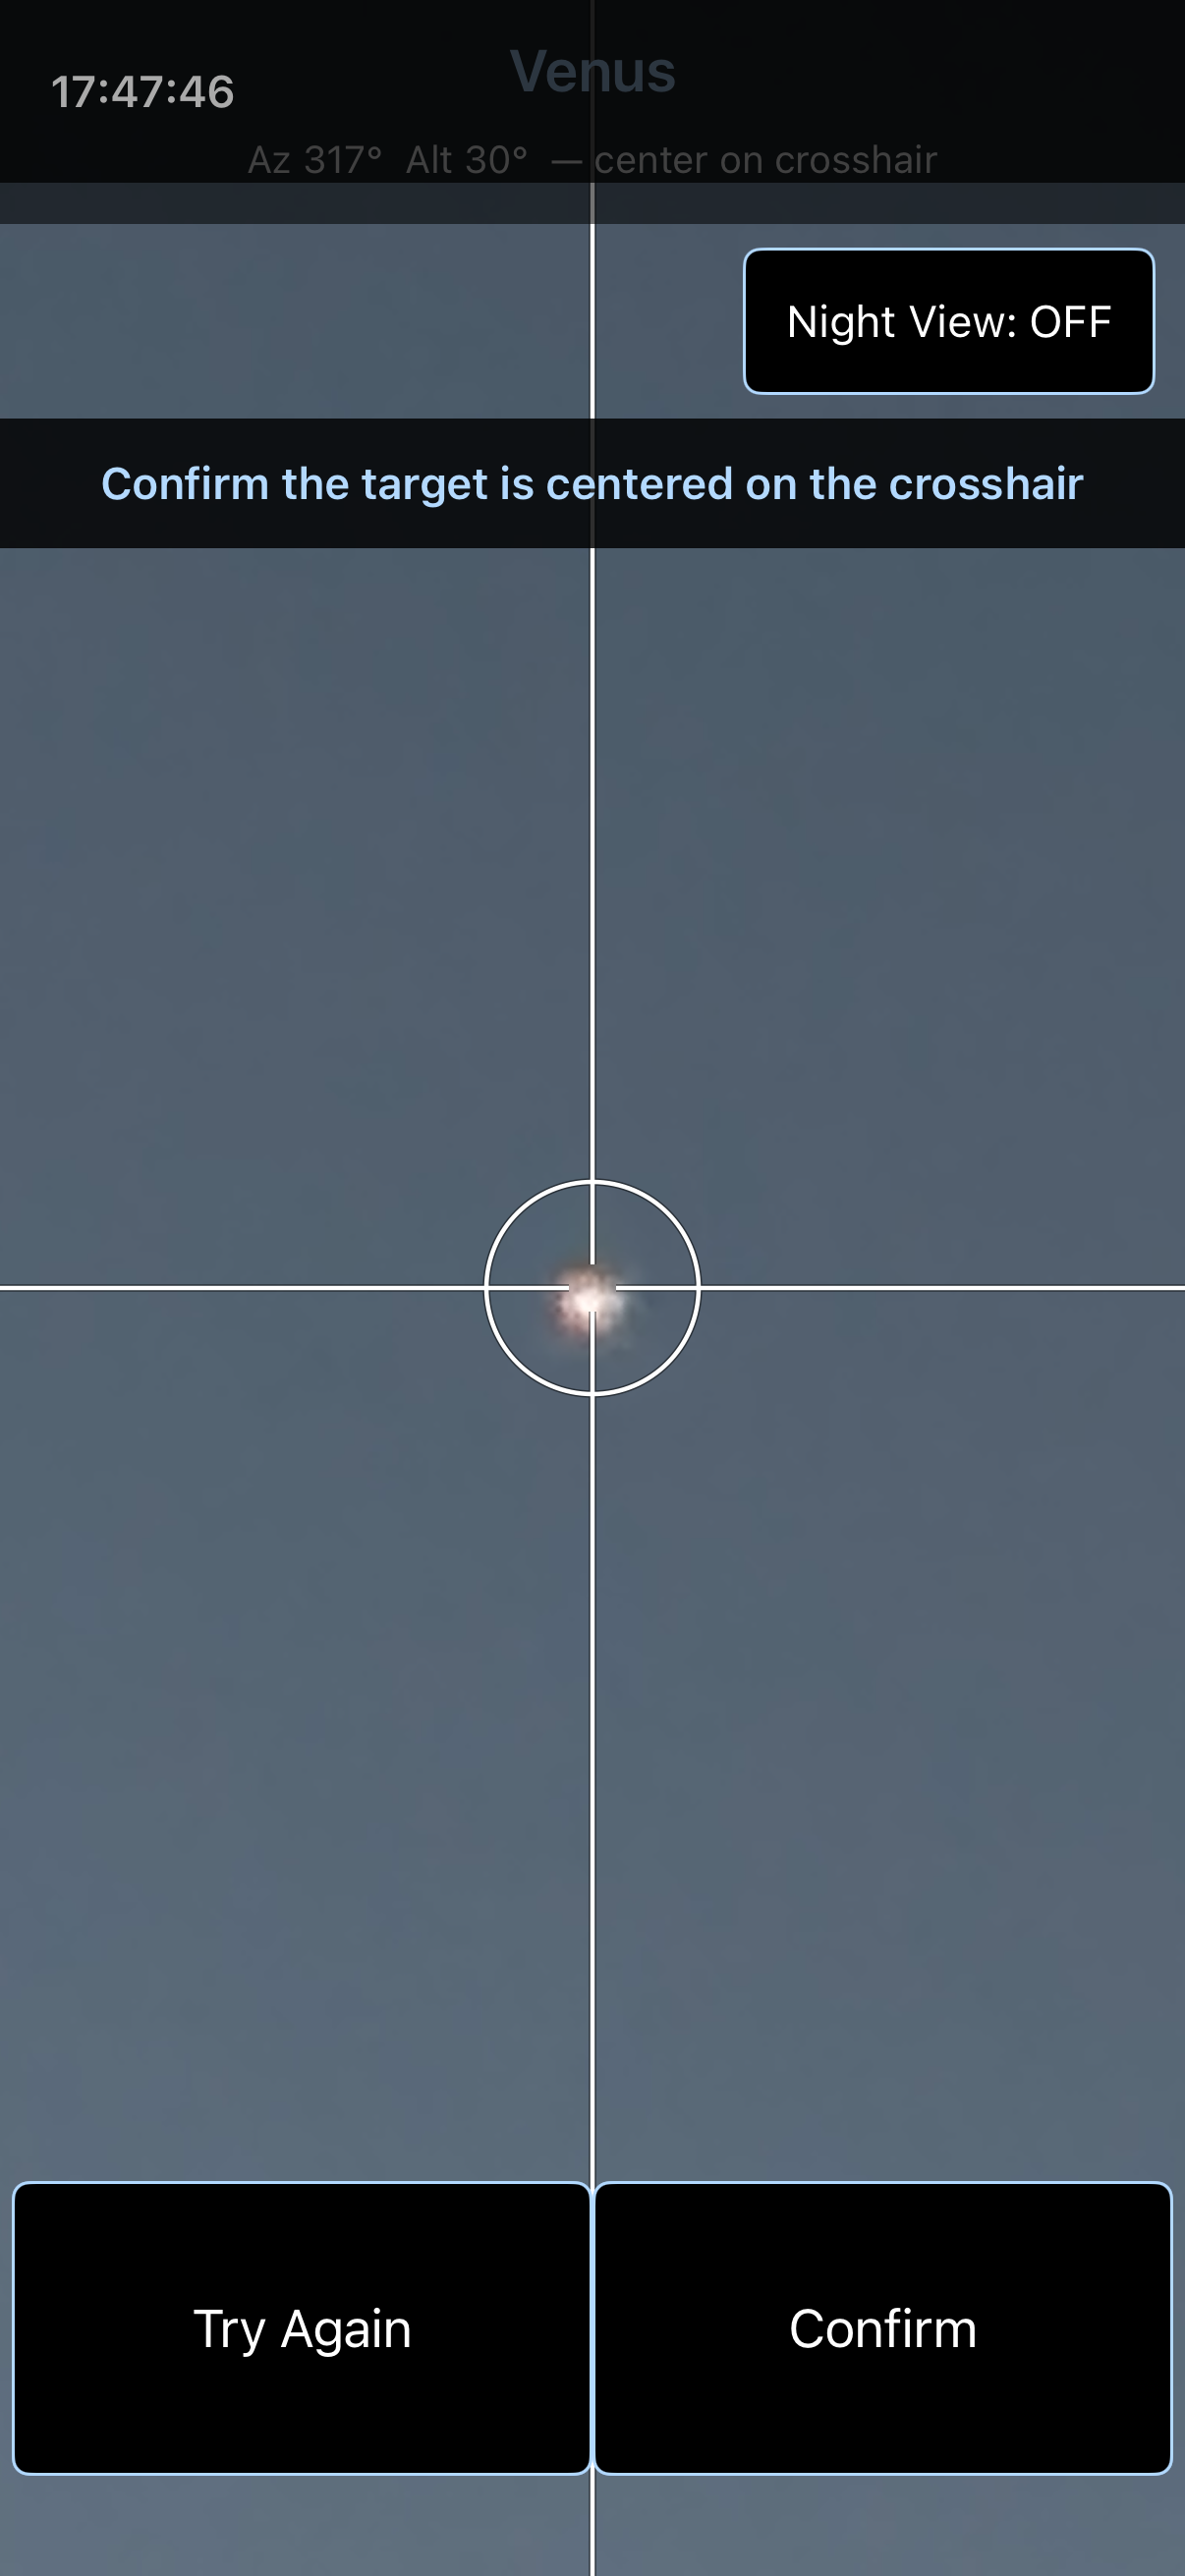
I did cheat a little on this one slightly and had my phone mounted on a tripod to steady it 😎!
If the star or planet is in the crosshairs hit Confirm, otherwise touch Try Again to improve your calibration. The Confirm button will take you back to the Daytime/No Polarscope screen as below.
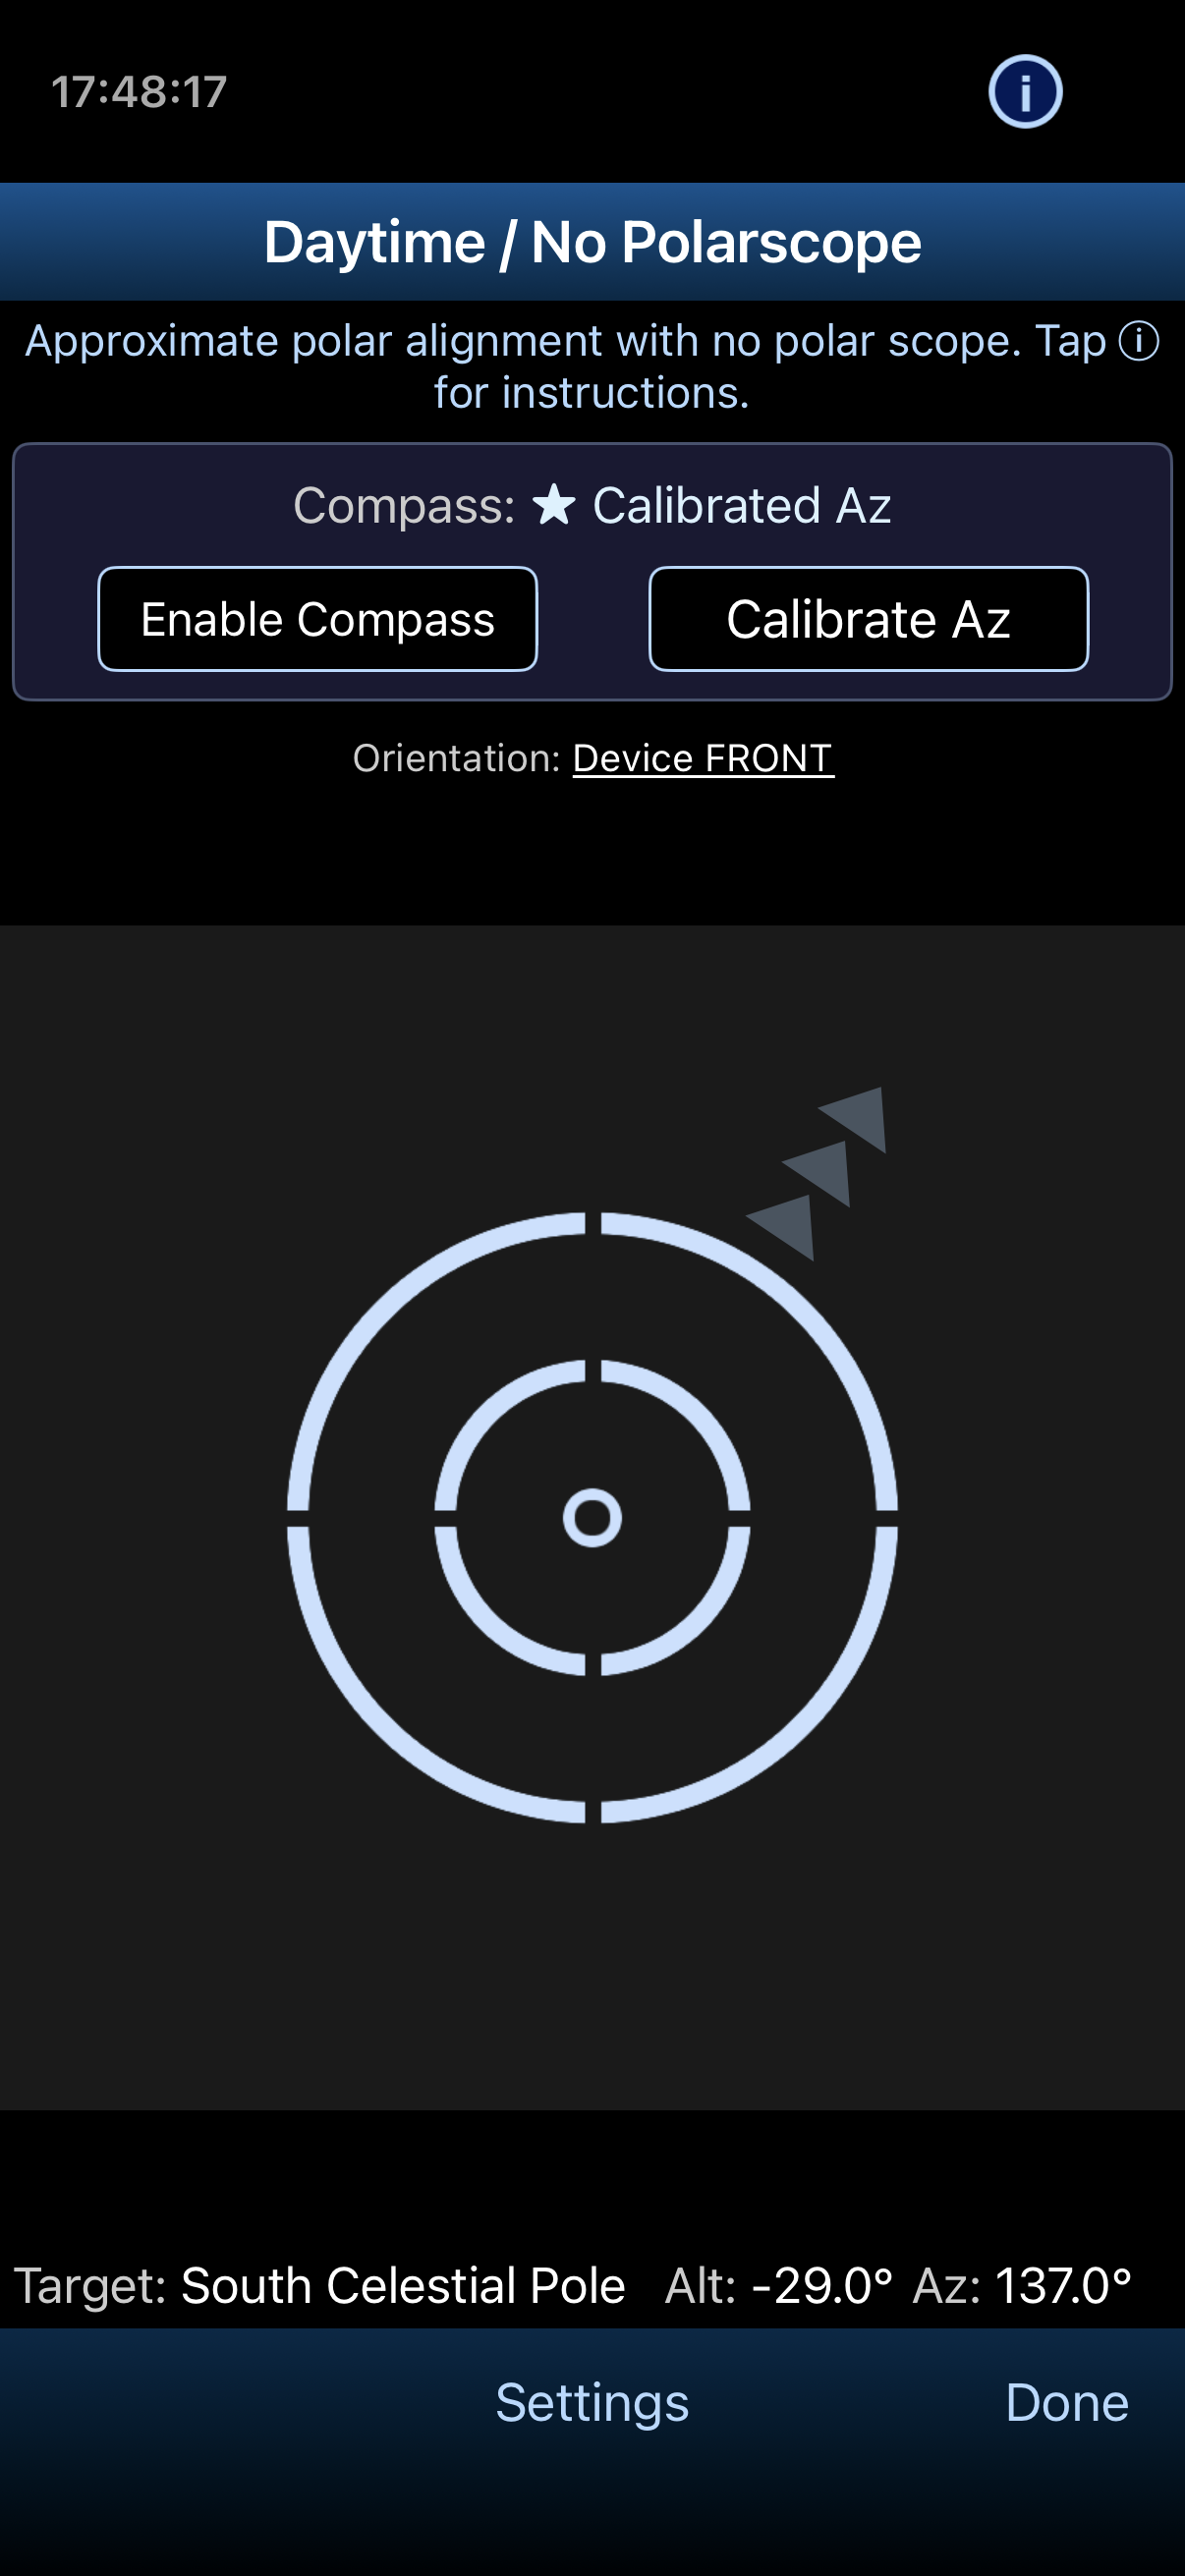
Don’t worry if the screen looks greyed out as above, it is probably because you are now pointing the phone at the ground. Just mount the phone on the tracker as you would normally do for polar alignment and you will see a screen with stars again.
Also don’t be put off by the fact that the compass has been disabled. The phone is no longer using it to determine where it is pointing but rather its internal gyros. These are not impacted by magnetic fields and the alignment should stay good for a while and will be much steadier than using the magnetic compass..
Now following the arrows adjust your tracker until you align with the polar alignment reticle
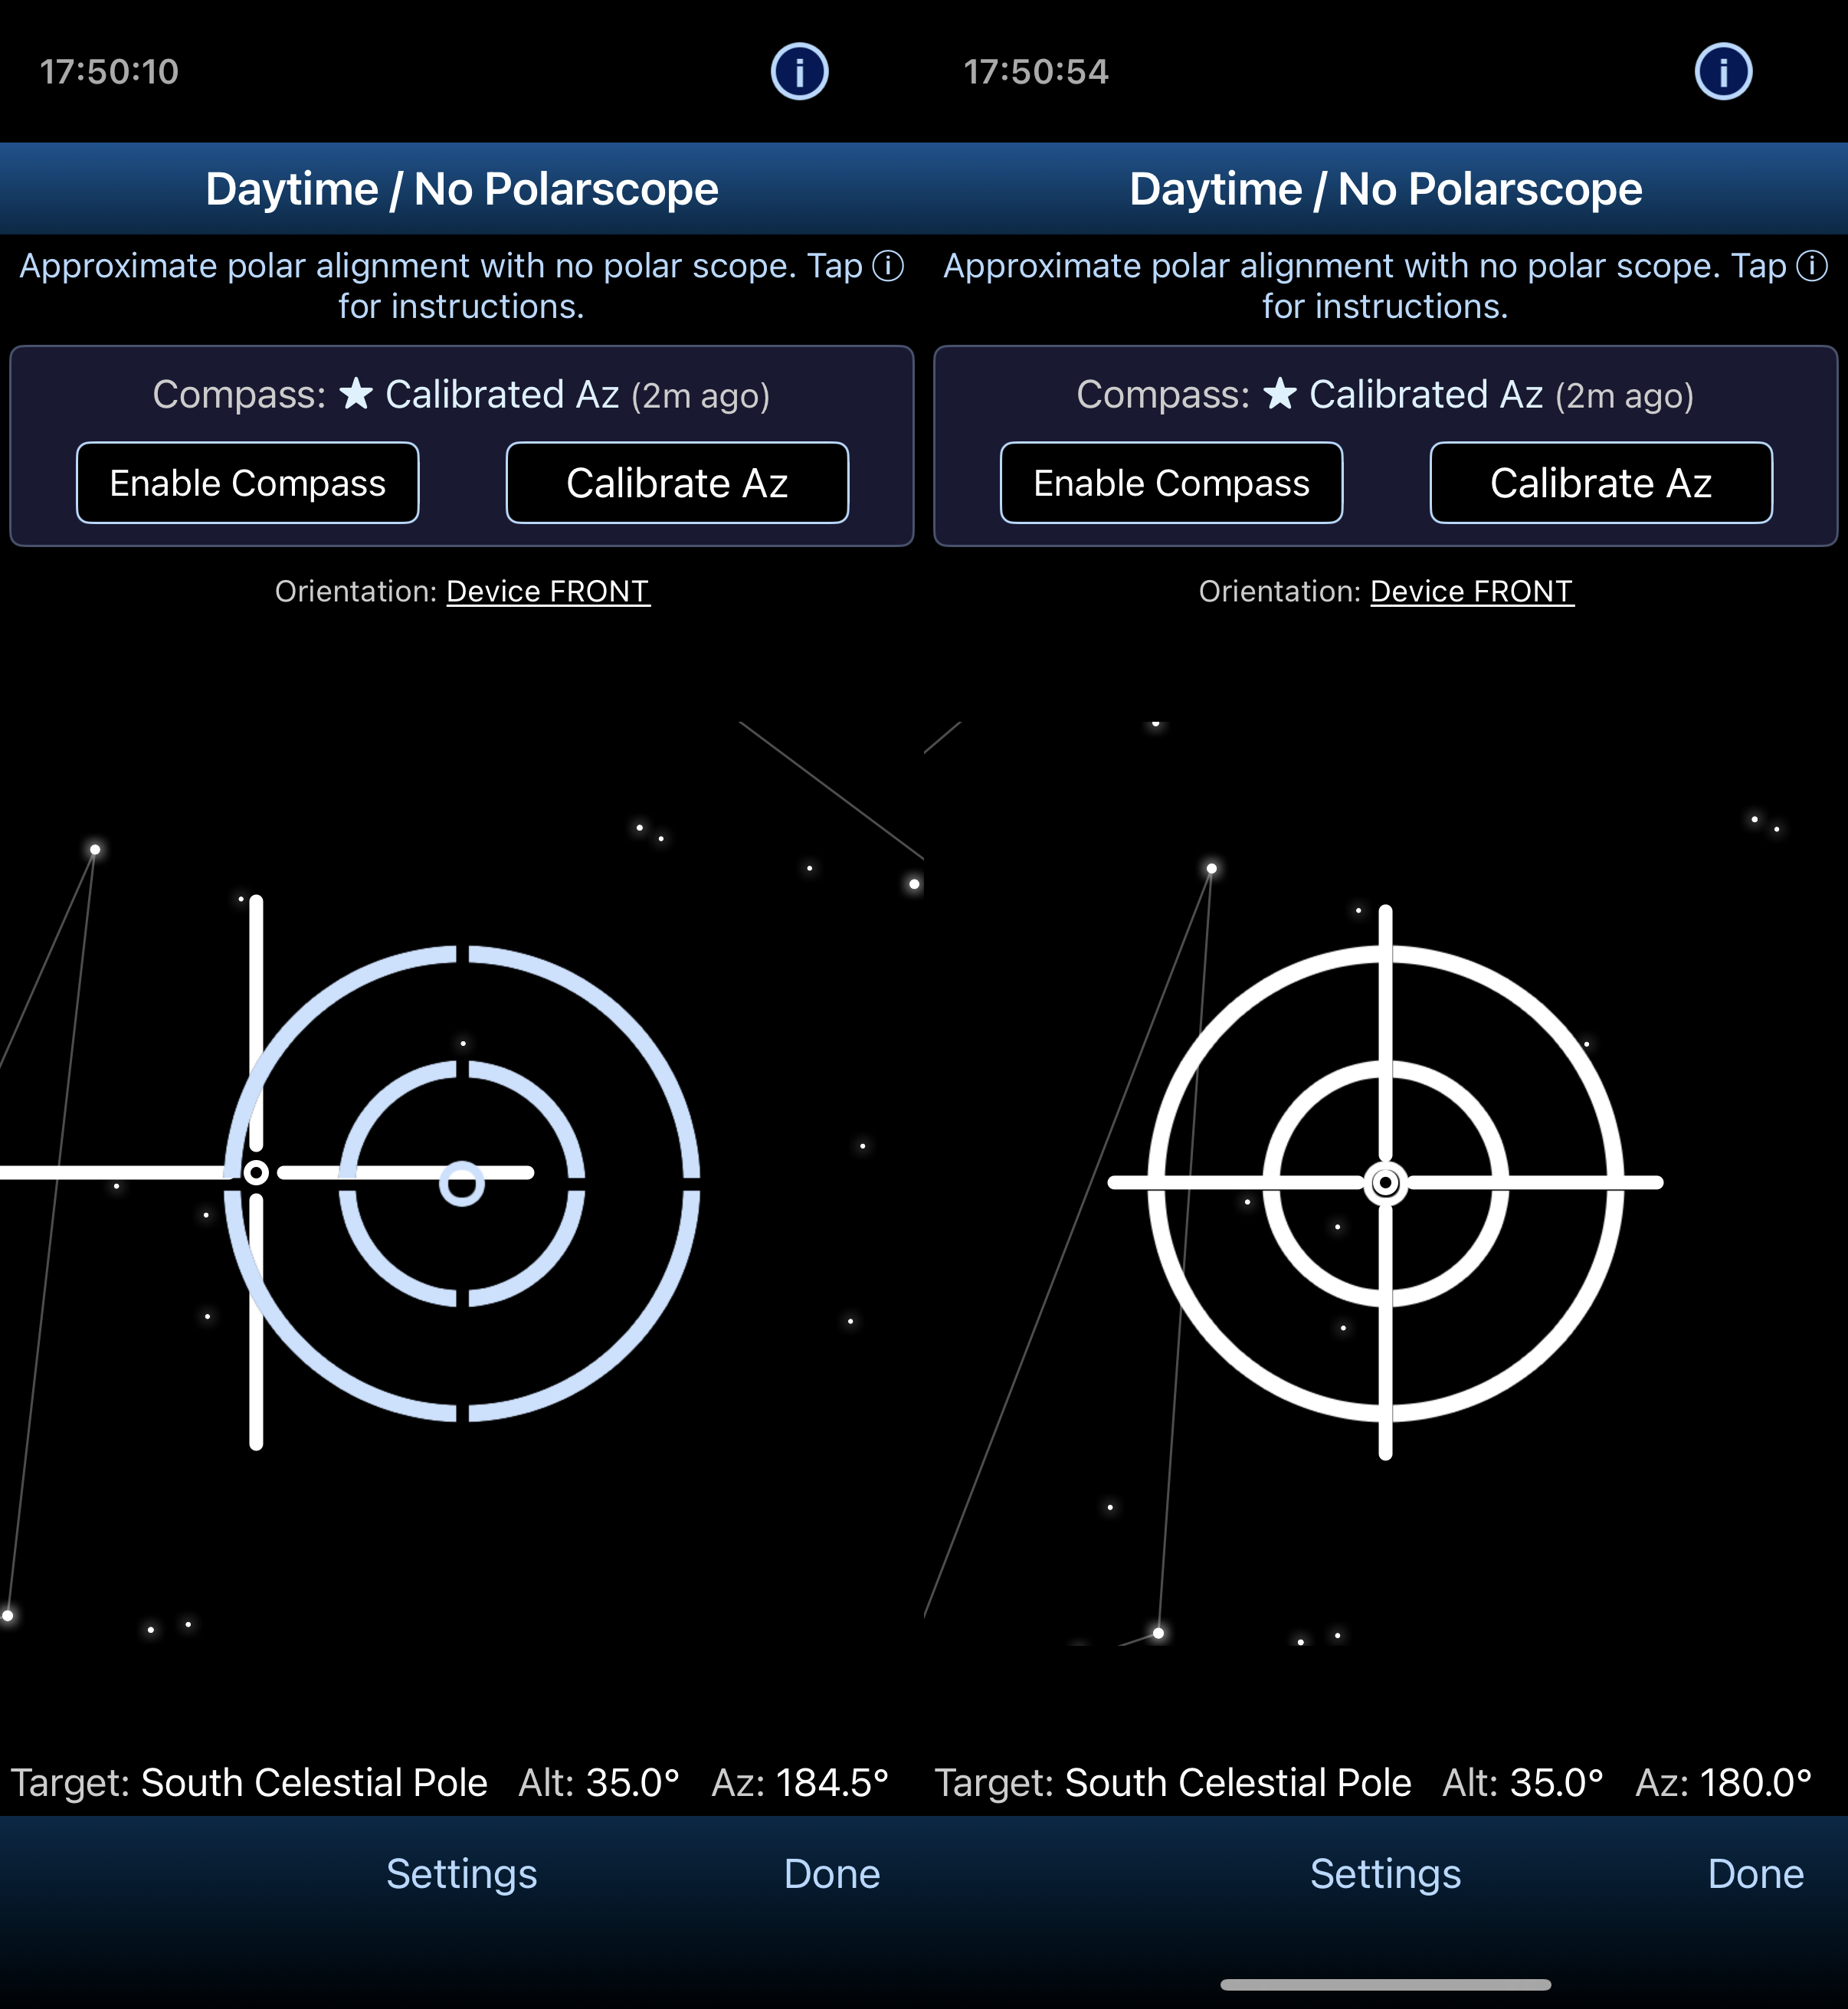
And you are done.
Does it work? Yep!
On my first try in my backyard (very light polluted and high cloud) I got the below image from a 10 minute tracked shot using a 50mm lens. If you pixel peep really hard you can see some tiny distortion of the stars I think, but really, for a 10 minute exposure from a small tracker like the Nomad this is an awesome result. I have put the untracked image below it just for reference.
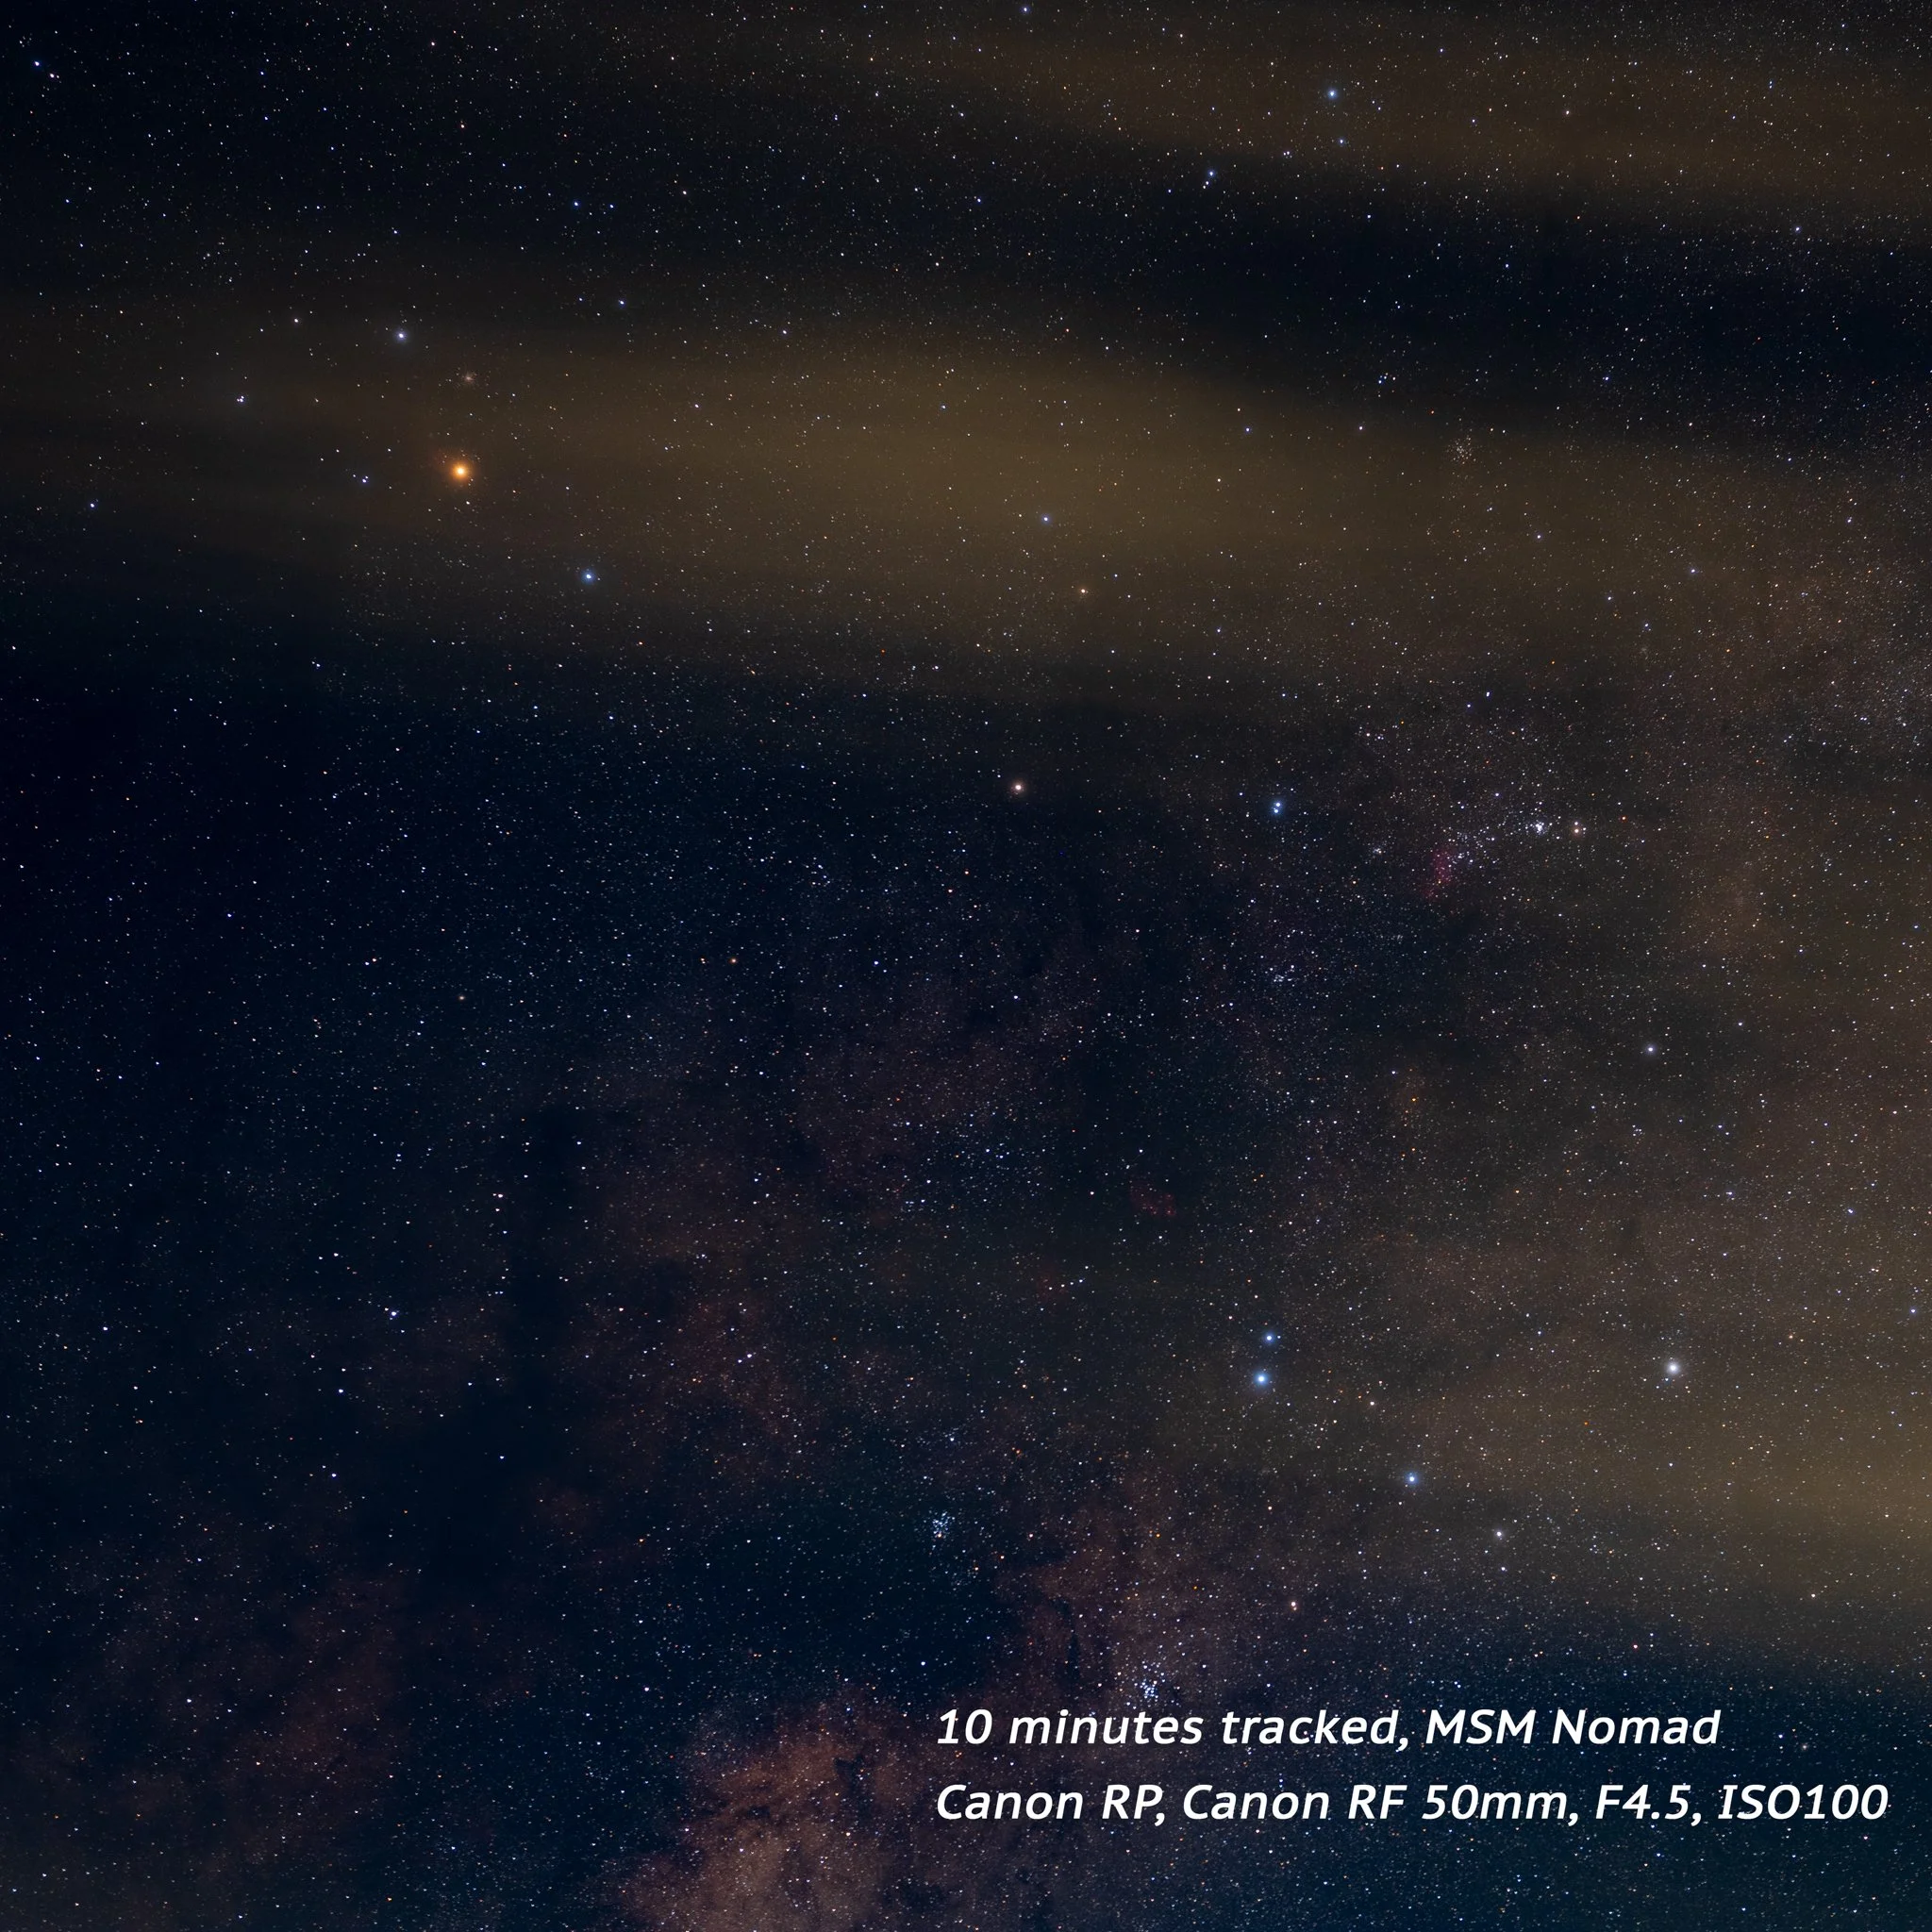
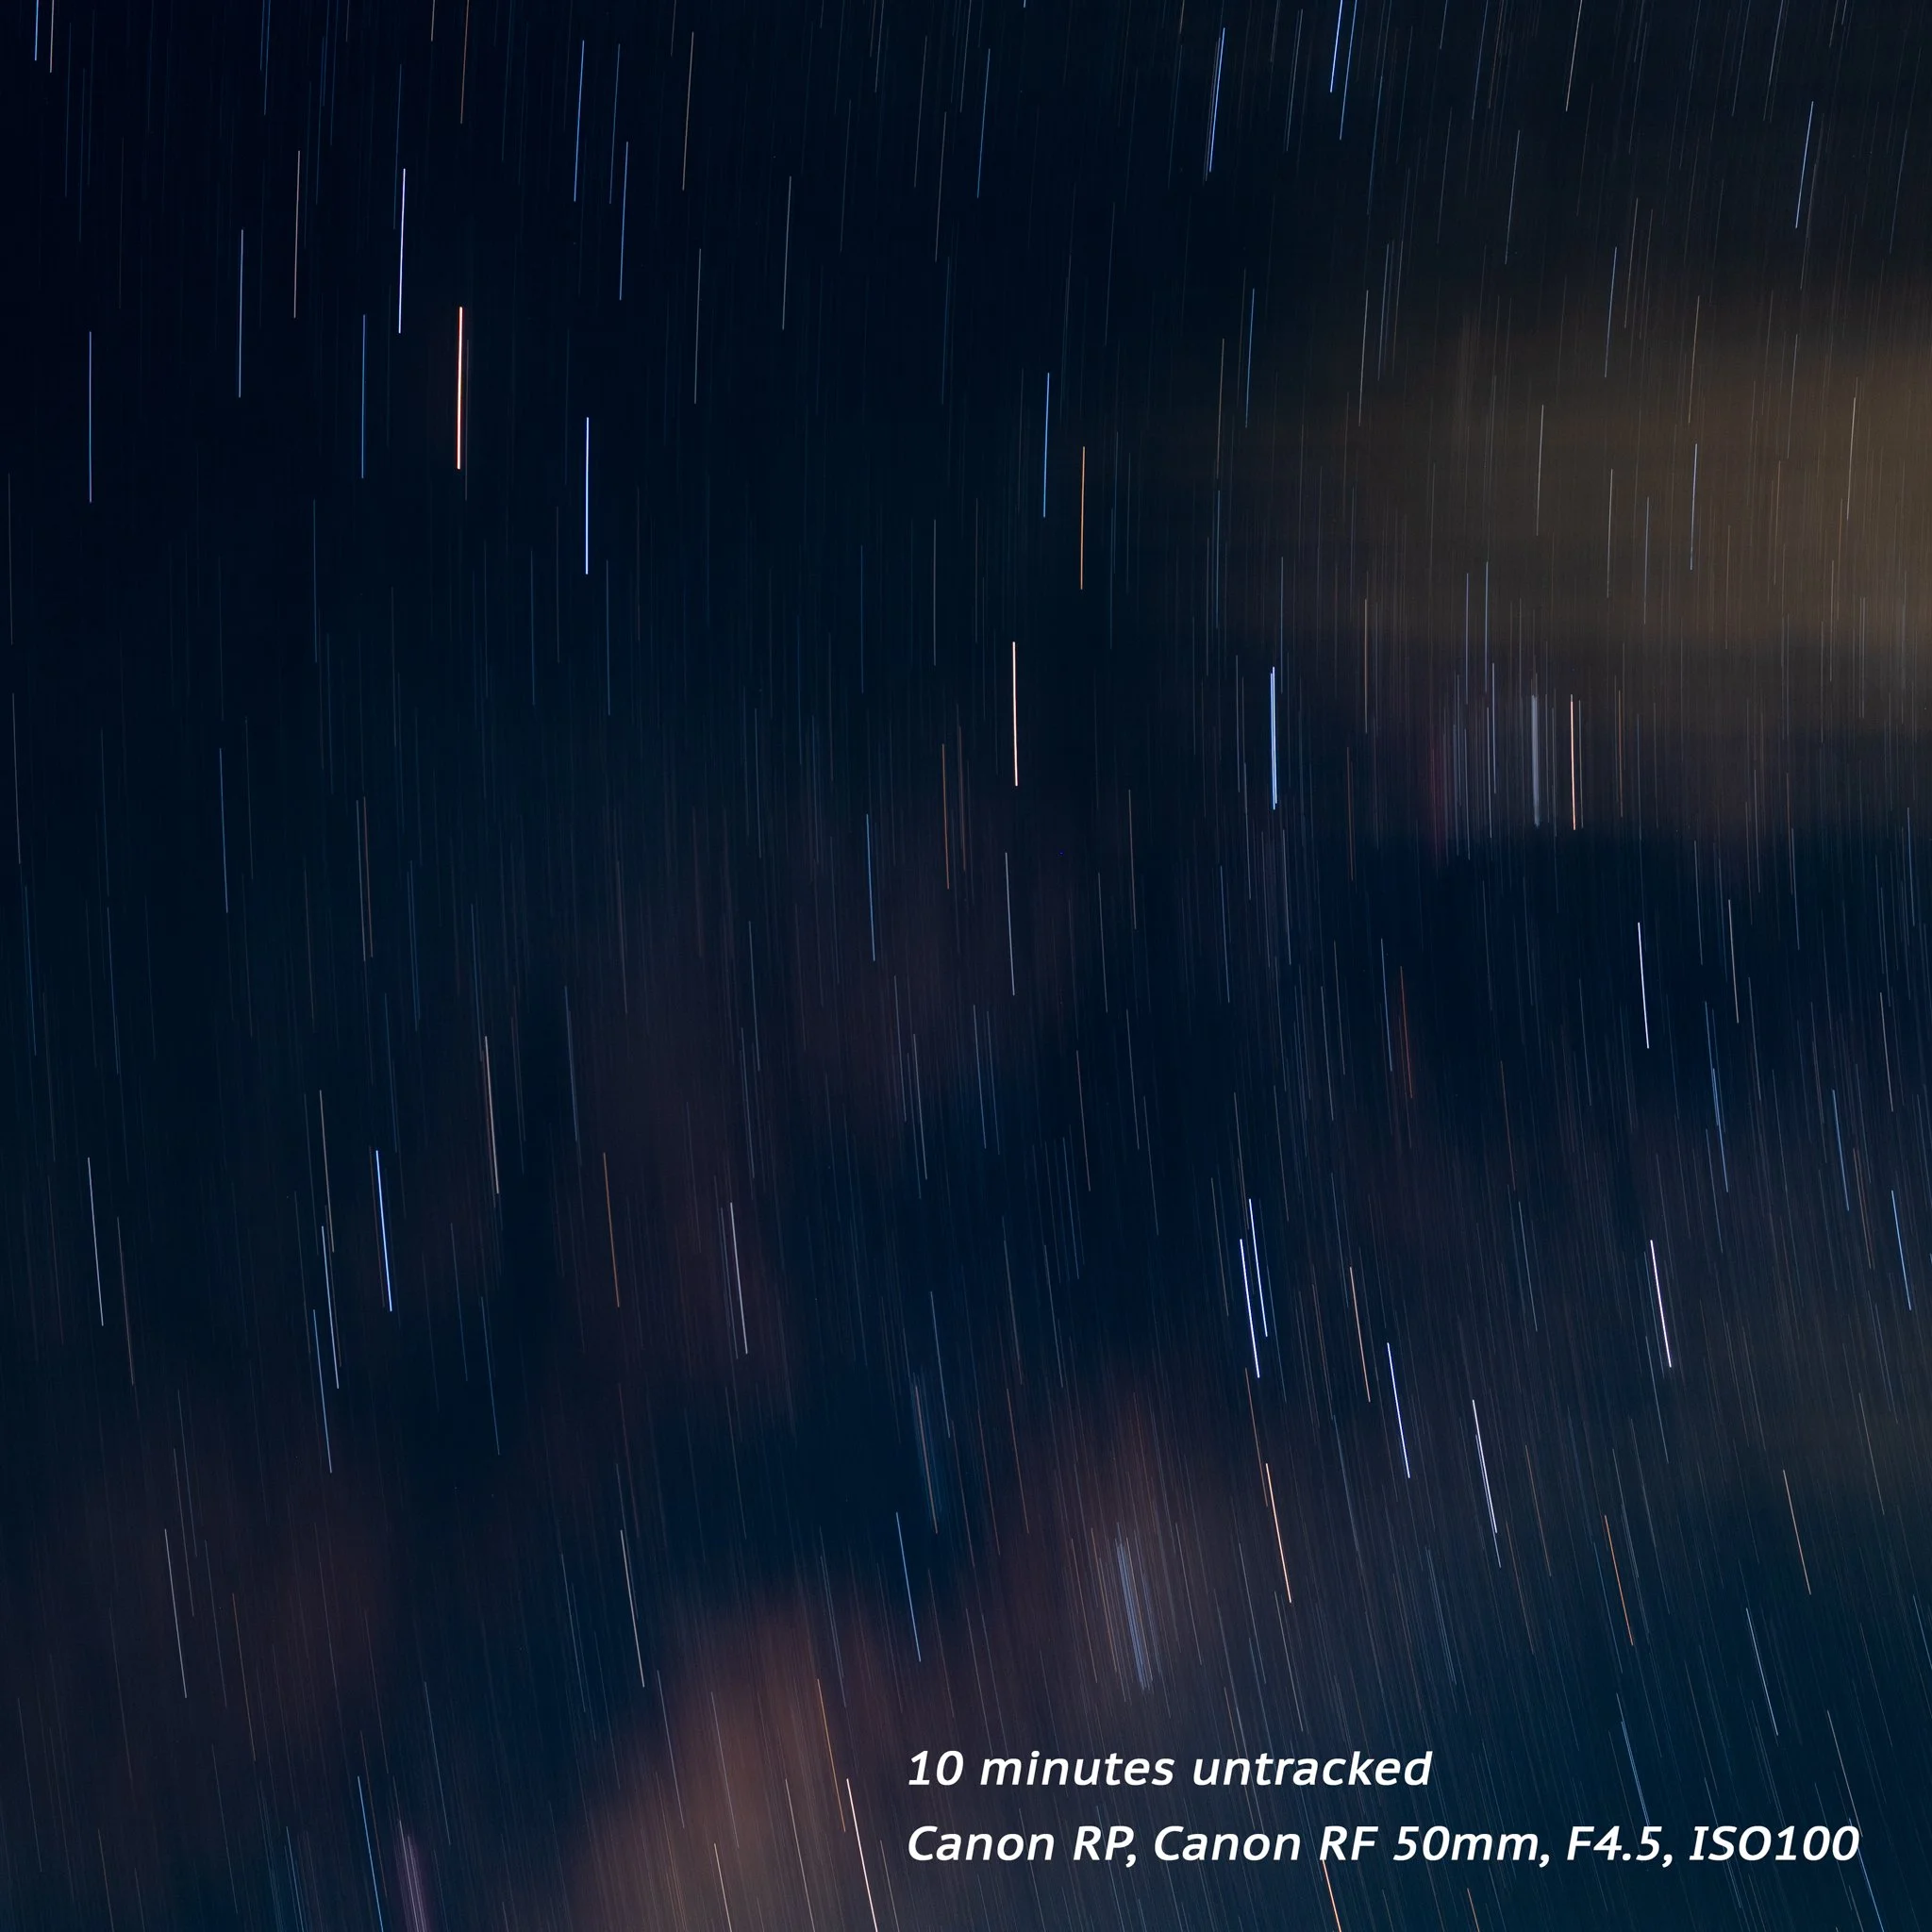
And this is what happens if you forget to turn the tracker on, a slight difference.
I tried 1, 2, 3, and 5 minute tracks as well, but if the 10 minute one worked obviously these did (just trust me). The reality is I very rarely shoot longer than 2 minutes with my astro-modified camera (except perhaps when I am doing Ha filtered images) so this looks to be more than adequate and at least as good as people manage using lasers and Polaris in the Northern hemisphere.
So is it better than using the normal phone apps like SkySafari Pro or PhotoPills which use the magnetic compass? I think yes, it is going to be much less impacted by local metal objects and it feels much steadier while doing the actual alignment than using the magnetic compass. Also it should be a real boon for people whose phone compass does not tend to be that accurate or have trouble getting steady readings for PA. This is not criticise these other apps, they are not designed to specifically do polar alighnment, PSAP is.
Will it work equally on all phones out there (assuming it comes to android soon), probably not as there are some massive differences in quality for different brands and models. But I think potentially it is much more likely to work with a wider range of phones in a wider range of circumstances. Only time and experience will tell.
But all that being said, I think this is yet another massive step up for the ease of use for trackers like the Nomad, which were already incredibly light and convenient.
PS, if you don’t like trying to find a star to calibrate with or find it to difficult to get a steady star alignment the app still has you covered. Just go to the Daytime /No Polarscope screen as above, do a phone calibration doing the traditional figure of 8 dance (away from any large metallic objects or magnetic fields) and then straight away touch the Disable Compass button. Once again the phones gyros will take over and you will be able to do your polar alignment as above. Not quite as accurate generally as the single star alignment, but still more than fine for most astro landscape work.
If you appreciate the efforts I put into these tests and instructions please consider buying me a coffee at this link, it is important for keeping me awake to do more tests 😁.
Clear Skies